How to Refactor a Large WordPress Plugin: Complete Guide
Introduction
A WordPress plugin often starts small.
You create a few hooks, add an admin page, implement a feature, and everything works.
Then the plugin grows.
New integrations are added. More database operations appear. REST endpoints are introduced. WooCommerce support is added. Notifications, analytics, automation, scheduled jobs, and external APIs become part of the system.
Eventually, one plugin class may contain hundreds or thousands of lines.
This is where technical debt becomes a serious problem.
A large plugin isn't necessarily badly designed. The real problem occurs when responsibilities become tightly coupled and every change creates unexpected side effects.
Refactoring can turn a difficult codebase into a cleaner, modular, testable architecture without requiring a complete rewrite.
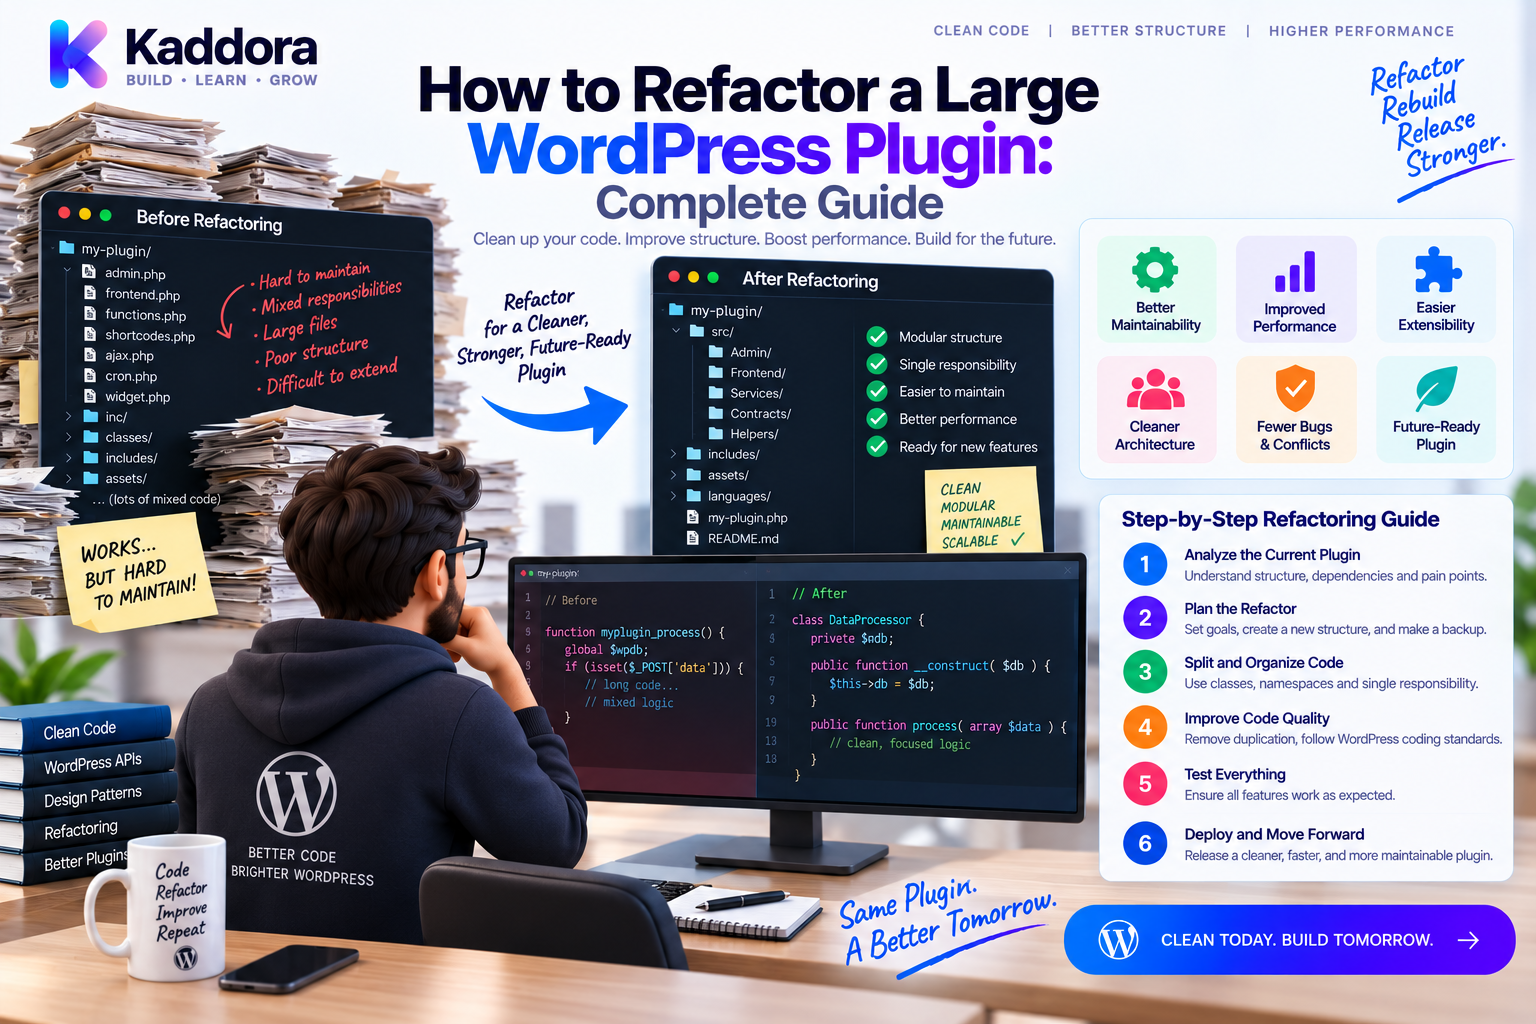
This guide explains how to refactor a large WordPress plugin safely, how to identify architectural problems, how to extract services and repositories, how to separate WordPress-specific code, and how to reduce regression risk during the process.
What Is WordPress Plugin Refactoring?
Refactoring means changing the internal structure of existing code without intentionally changing its external behavior.
The goal is to improve:
Maintainability
Readability
Testability
Modularity
Performance
Extensibility
Developer productivity
A useful principle is:
Change the structure before changing the behavior.
For example, instead of rewriting a complete order system, first move order-related logic from a large class into an OrderService.
Signs That a WordPress Plugin Needs Refactoring
Several symptoms indicate that a plugin has become difficult to maintain.
1. One Giant Plugin Class
final class Plugin { // 2,000+ lines }
It may contain:
Hooks
Database queries
API requests
Admin UI
Validation
Reports
WooCommerce logic
This is often a sign that responsibilities need to be separated.
2. Large Hook Callbacks
A callback such as:
add_action( 'init', function () { // Query database. // Call API. // Process orders. // Send emails. // Update analytics. } );
becomes difficult to understand and test.
3. Direct Dependencies Everywhere
Examples include:
new WPDBManager(); new CrmApi(); new Mailer();
inside business logic.
This makes replacement and unit testing harder.
4. Repeated Code
The same validation, database queries, API handling, and formatting logic appear in several locations.
Duplication increases maintenance costs.
5. Fear of Making Changes
When developers hesitate to modify a class because unrelated functionality might break, the architecture probably has excessive coupling.
Step 1: Understand the Existing Plugin
Never begin by randomly moving files.
First map the plugin.
Create a simple architecture diagram:
Plugin Bootstrap ↓ Hooks ↓ Business Logic ↓ Database / APIs / External Services
Then identify:
Entry points
Hooks
REST endpoints
Admin pages
AJAX handlers
Cron jobs
Database operations
External integrations
Front-end assets
Public APIs
The goal is to understand how the current system works before changing it.
Step 2: Identify Responsibilities
Look through large classes and group methods by responsibility.
For example:
Large Plugin Class ├── Orders ├── Customers ├── Emails ├── CRM ├── Reports ├── Admin UI └── REST API
These can become separate components:
OrderService CustomerService EmailService CrmService ReportService AdminController RestController
This is one of the most effective first steps in plugin refactoring.
Step 3: Separate WordPress Integration From Business Logic
WordPress-specific APIs are everywhere:
add_action()
add_filter()
get_option()
update_option()
WP_Query
wp_remote_get()
current_user_can()
These are framework concerns.
Try to keep them near the integration boundary.
A cleaner structure is:
WordPress Hook ↓ Listener ↓ Service ↓ Repository / Adapter
For example:
final class OrderListener { public function __construct( private OrderService $service ) {} public function register(): void { add_action( 'kdr_order_completed', [ $this, 'handle' ], 10, 1 ); } public function handle( $order_id ): void { $this->service->process( (int) $order_id ); } }
The listener understands WordPress.
The service handles the business operation.
Step 4: Extract Service Classes
A service should represent a meaningful business capability.
For example:
final class CustomerService { public function create( array $data ): int { // Customer business logic. } public function update( int $customer_id, array $data ): void { // Update logic. } }
Instead of having customer functionality spread through multiple hook callbacks, controllers, and admin classes, it has a central service.
A useful architecture becomes:
Controller / Listener ↓ CustomerService ↓ Repository
Step 5: Extract Database Logic Into Repositories
One common problem in large plugins is SQL appearing everywhere.
For example:
global $wpdb; $row = $wpdb->get_row( $wpdb->prepare( "SELECT * FROM {$table} WHERE id = %d", $id ) );
Repeated database code makes changes difficult.
A repository can encapsulate it:
interface OrderRepositoryInterface { public function find( int $order_id ): ?array; }
Implementation:
final class WordPressOrderRepository implements OrderRepositoryInterface { public function find( int $order_id ): ?array { // Database implementation. } }
Then:
final class OrderService { public function __construct( private OrderRepositoryInterface $orders ) {} public function get( int $order_id ): ?array { return $this->orders->find( $order_id ); } }
Now business logic doesn't need to know how data is stored.
Step 6: Extract External API Integrations
External services should not be tightly coupled to core business classes.
For example:
OrderService ↓ CrmInterface ↓ HubSpotAdapter
Interface:
interface CrmInterface { public function syncOrder( int $order_id ): void; }
Implementation:
final class CrmAdapter implements CrmInterface { public function syncOrder( int $order_id ): void { // External API communication. } }
This makes integrations easier to test and replace.
Step 7: Introduce Dependency Injection
Avoid creating dependencies inside business classes.
Instead of:
final class OrderService { public function process(): void { $crm = new CrmAdapter(); } }
inject the dependency:
final class OrderService { public function __construct( private CrmInterface $crm ) {} public function process( int $order_id ): void { $this->crm->syncOrder( $order_id ); } }
Now the service can receive a production implementation, test double, or alternative adapter.
Step 8: Refactor Hooks Into Dedicated Listeners
Large plugins often have hundreds of hook registrations inside one bootstrap class.
Instead:
src/ ├── Listeners/ │ ├── OrderListener.php │ ├── ProductListener.php │ └── CustomerListener.php
Each listener can register related hooks.
WordPress ↓ OrderListener ↓ OrderService
This makes hook ownership easier to discover.
Step 9: Split Admin and REST Responsibilities
Don't combine admin screens and REST endpoints with business logic.
Use separate components:
Admin/ ├── SettingsPage.php └── ReportsPage.php Rest/ ├── OrderController.php └── CustomerController.php
Then both can use the same services:
Admin Controller ──┐ ↓ OrderService ↑ REST Controller ───┘
This prevents duplicate business rules.
Step 10: Introduce a Clear Directory Structure
A growing plugin might use:
plugin/ ├── plugin.php ├── composer.json ├── src/ │ ├── Admin/ │ ├── Adapters/ │ ├── Interfaces/ │ ├── Listeners/ │ ├── Repositories/ │ ├── Rest/ │ ├── Services/ │ └── Plugin.php ├── tests/ └── vendor/
For larger products, module-based organization may work even better:
src/ ├── Commerce/ │ ├── Services/ │ ├── Listeners/ │ └── Repositories/ ├── Analytics/ ├── Notifications/ └── Integrations/
Choose the structure developers can navigate easily.
Step 11: Add Composer Autoloading
Composer can provide PSR-4 autoloading.
Example:
{ "autoload": { "psr-4": { "Kaddora\\Plugin\\": "src/" } } }
Then:
composer dump-autoload
This removes the need for manual require_once statements throughout the plugin.
Step 12: Refactor Gradually
Don't rewrite everything in one massive change.
A safer workflow is:
Identify One Problem ↓ Extract One Component ↓ Run Tests ↓ Verify Plugin ↓ Commit ↓ Repeat
Small changes are easier to review and roll back.
Step 13: Protect Existing Behavior With Tests
Before significant refactoring, create tests around important functionality.
Test:
Service behavior
Validation
Repository operations
API integrations
Hook execution
REST endpoints
Admin functionality
A useful distinction is:
Unit Tests ↓ Business Logic Integration Tests ↓ WordPress + Plugin End-to-End Tests ↓ Real User Workflows
Tests give refactoring a safety net.
Step 14: Add Static Analysis
Static-analysis tools can identify problems without executing every code path.
For example:
PHPStan
PHP_CodeSniffer
WordPress Coding Standards
Static analysis can help detect:
Incorrect types
Undefined methods
Inconsistent APIs
Coding-standard violations
Suspicious code
Run these checks continuously instead of waiting until release time.
Step 15: Use Interfaces Where They Add Value
Don't create an interface for every class.
Good candidates include:
Payment gateways
CRM adapters
Storage implementations
Cache providers
External API clients
Search providers
For example:
PaymentGatewayInterface ├── StripeGateway └── PayPalGateway
Interfaces are most useful when implementations may vary or when testing benefits from substituting dependencies.
Step 16: Deal With Legacy Code Carefully
You don't need to immediately remove every old method.
A large plugin may need transitional architecture.
For example:
Legacy Code ↓ Compatibility Layer ↓ New Service ↓ New Architecture
This allows existing integrations to continue working while new functionality uses better architecture.
When public APIs or hooks are involved, preserve backward compatibility whenever practical.
Step 17: Separate Configuration From Logic
Avoid spreading configuration throughout classes.
Instead:
Configuration ↓ Service / Provider ↓ Business Logic
Environment-specific values such as API URLs, feature flags, and credentials should not be hard-coded into business classes.
Secrets should also never be committed to source control.
Step 18: Refactor Database Access Carefully
Database refactoring deserves special attention.
Before changing queries:
Record existing behavior
Check indexes
Check expected data
Review transactions where applicable
Test large datasets
Verify migration behavior
Never assume that moving a query to a repository automatically improves performance.
Architecture and performance are related, but they are not the same problem.
Step 19: Keep Public APIs Stable
A mature plugin may expose:
Actions
Filters
REST endpoints
PHP classes
Database structures
Shortcodes
CLI commands
These can become integration contracts.
Before changing them, determine:
Is this internal? ↓ Refactor freely Is this public? ↓ Preserve compatibility or deprecate carefully
Changing hook names or callback arguments can break third-party extensions.
Refactoring Workflow for a Large Plugin
A practical migration strategy looks like:
Audit ↓ Map Dependencies ↓ Identify Responsibilities ↓ Extract Services ↓ Extract Repositories ↓ Extract Listeners ↓ Introduce Interfaces ↓ Add Dependency Injection ↓ Add Tests ↓ Run Static Analysis ↓ Remove Duplication ↓ Monitor Production
This incremental strategy is much safer than starting from scratch.
Common Refactoring Mistakes
Rewriting Everything
A complete rewrite can remove years of accumulated bug fixes and compatibility knowledge.
Changing Behavior Accidentally
Refactoring should preserve behavior unless behavior changes are intentional.
Creating Too Many Abstractions
Over-engineering makes the architecture harder to understand.
Ignoring Hooks
Public hooks are part of the plugin's extension ecosystem.
Removing Legacy Code Too Quickly
Old integrations may still depend on it.
Refactoring Without Tests
Without tests, regressions are difficult to detect.
Mixing Refactoring With New Features
Combining architectural changes and feature development makes debugging harder.
A better approach is to refactor a small area, verify it, then add new functionality.
Using AI During Plugin Refactoring
AI coding tools can help analyze a large WordPress plugin.
Useful AI-assisted tasks include:
Finding large classes
Identifying duplicated code
Grouping responsibilities
Suggesting service extraction
Generating interfaces
Creating listener classes
Writing initial tests
Explaining dependencies
Detecting potentially dead code
For example, an AI tool can review a large class and suggest:
Plugin.php ↓ OrderService CustomerService ReportService CrmService AdminController OrderListener
However, AI-generated refactoring should be reviewed carefully.
WordPress plugins often depend on subtle hook ordering, public APIs, database behavior, and backward compatibility.
Never merge large automated refactors without testing.
Performance During Refactoring
Refactoring for cleaner architecture does not automatically make a plugin faster.
Measure performance before and after changes.
Monitor:
Query count
Query duration
HTTP requests
Memory usage
REST response time
Admin load time
Front-end performance
A useful principle is:
First improve structure. Then measure performance.
Optimize based on evidence.
Recommended Architecture
A production-ready plugin might eventually look like:
WordPress ↓ Hooks / REST / Admin ↓ Listeners / Controllers ↓ Application Services ↓ Interfaces ↓ Repositories / Adapters ↓ Database / External APIs
This structure separates framework concerns from business logic while allowing each layer to evolve independently.
WordPress Plugin Refactoring Checklist
Discovery
Map plugin entry points
List hooks
Identify public APIs
Identify database dependencies
Identify external integrations
Architecture
Extract services
Extract repositories
Separate listeners
Separate REST and admin layers
Introduce dependency injection where useful
Quality
Add tests
Run static analysis
Remove duplication
Improve type safety
Document important APIs
Safety
Back up production data
Use version control
Refactor incrementally
Preserve public contracts
Test before deployment
Why Choose ThemeKaddora?
ThemeKaddora develops WordPress-focused digital products where maintainability becomes increasingly important as features grow.
A scalable product architecture can separate:
Core Plugin ↓ Services ↓ Repositories ↓ Integrations
while WordPress-specific hooks, REST endpoints, admin interfaces, and WooCommerce events remain at the appropriate integration layer.
For complex products, Composer, namespaces, dependency injection, service containers, repositories, automated testing, and static analysis can provide a strong foundation for long-term development.
The objective isn't to make a plugin unnecessarily complicated.
The objective is to make future development safer and faster.
Conclusion
Refactoring a large WordPress plugin is a process of improving structure without unnecessarily changing behavior.
The safest approach is incremental.
Start by understanding the existing codebase. Identify responsibilities, extract services, move database operations into repositories, isolate external integrations, separate hook listeners, introduce dependency injection where valuable, and add tests before making large architectural changes.
Most importantly, don't treat refactoring as a complete rewrite.
A mature WordPress plugin contains valuable behavior, integrations, and compatibility knowledge. Preserve those strengths while gradually moving the code toward a cleaner architecture.
A strong refactoring strategy is:
Understand → Separate → Abstract → Test → Measure → Repeat
The result should be a plugin that is easier to maintain, safer to modify, simpler to test, and better prepared for future features.
Frequently Asked Questions
What does refactoring a WordPress plugin mean?
Refactoring means improving the internal structure of a WordPress plugin while preserving its existing behavior unless a behavior change is intentional.
When should I refactor a WordPress plugin?
Consider refactoring when classes become very large, responsibilities are mixed, dependencies are tightly coupled, code is duplicated, testing is difficult, or small changes regularly create unexpected regressions.
Should I rewrite a large WordPress plugin from scratch?
Usually not. Incremental refactoring is often safer because it preserves existing behavior and allows changes to be tested in smaller stages.
How do I break up a large WordPress plugin?
Start by grouping responsibilities, then extract services, repositories, listeners, controllers, and integrations into focused components.
What is a service class in WordPress?
A service class contains a focused business operation, such as processing an order, managing customers, generating reports, or synchronizing data.
Why use repositories in WordPress plugins?
Repositories isolate data-access logic from business logic, making database operations easier to maintain, test, and replace.
Should WordPress hooks be inside service classes?
For larger plugins, it is often cleaner to keep hook registration in listeners or integration classes and call services from those listeners.
Is dependency injection useful in WordPress?
Yes. Dependency injection can reduce coupling and make services easier to test and replace.
Should every WordPress class have an interface?
No. Interfaces are most useful where implementations need to vary, external integrations need abstraction, or test substitution provides meaningful value.
How can I refactor a plugin without breaking hooks?
Map the plugin's public actions and filters first. Preserve hook names, arguments, and expected behavior unless you have a deliberate compatibility or deprecation strategy.
Should I use Composer while refactoring?
Composer is highly useful for PSR-4 autoloading and dependency management in larger object-oriented WordPress plugins.
What tests should I write before refactoring?
Prioritize tests around important business logic, data operations, REST endpoints, integrations, hooks, and critical user workflows.
Does refactoring improve WordPress plugin performance?
Not automatically. Refactoring mainly improves structure and maintainability. Performance should be measured separately using profiling and monitoring.
Can AI help refactor a WordPress plugin?
Yes. AI can help identify large classes, duplicated responsibilities, dependency problems, and potential service boundaries. Generated changes should still be reviewed and tested carefully.
Why choose Themekaddora?
Themekaddora provides lightweight, responsive, SEO-friendly WordPress themes with fast performance, WooCommerce compatibility, flexible customization, accessibility-conscious design, modern templates, regular updates, and professional support—providing a strong foundation for businesses building digital products and product-focused websites.
Comments (0)