
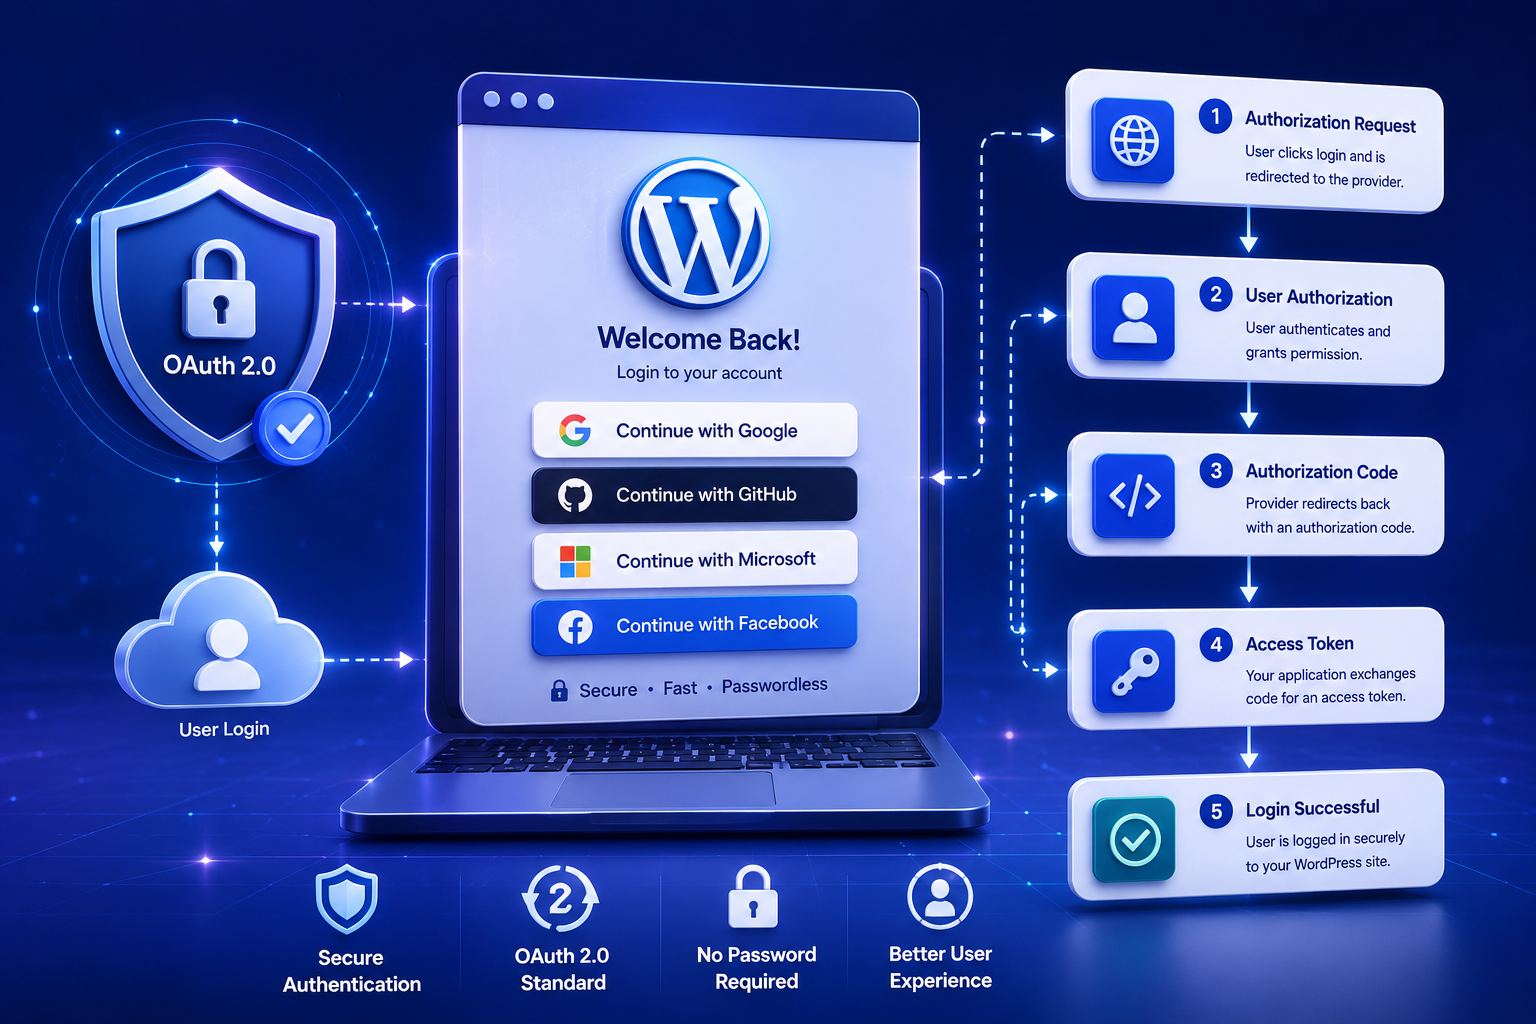
How to Build OAuth Login With WordPress: Complete Developer Guide
Introduction
Modern websites increasingly allow users to sign in with an existing account from another identity provider.
Instead of creating another username and password, a visitor may see:
Continue with External Provider
and then:
WordPress ↓ Identity Provider ↓ User Login ↓ Consent / Authorization ↓ Callback to WordPress ↓ User Account ↓ Logged Into WordPress
This can create a smoother registration and login experience.
Common providers and identity platforms can expose OAuth 2.0 and, for authentication, OpenID Connect (OIDC) capabilities. The distinction matters:
OAuth is primarily an authorization framework. OpenID Connect adds an identity layer for authentication.
Therefore, when the goal is specifically "log the user into WordPress based on their external identity," the preferred design is generally an OAuth-based flow combined with an identity protocol such as OIDC when the provider supports it.
Modern OAuth security guidance also recommends strong protections around authorization-code flows. RFC 9700 recommends PKCE for public clients and recommends it for confidential clients as well, while emphasizing CSRF protection through PKCE, state, or appropriate OIDC mechanisms.
WordPress itself supports several authentication mechanisms for its REST API, including cookie authentication for logged-in WordPress users and Application Passwords for programmatic access. External OAuth-based login is typically implemented by a plugin or custom integration rather than being the standard built-in WordPress login mechanism.
A production OAuth login system therefore has to solve several problems:
Starting authorization
Protecting the authorization request
Handling callbacks
Validating identity
Creating or finding a WordPress user
Linking an external account
Starting a WordPress session
Handling existing accounts
Preventing duplicate accounts
Handling revoked access
Protecting tokens
Supporting multiple providers
Handling account switching
Managing errors
The complete architecture looks like:
Visitor ↓ WordPress Login Page ↓ "Continue With Provider" ↓ Authorization Request ↓ Identity Provider ↓ User Authentication ↓ Authorization Code ↓ WordPress Callback ↓ Validate State / PKCE ↓ Exchange Code ↓ Validate Identity ↓ Find / Create WordPress User ↓ Start WordPress Session ↓ Logged-In User
This guide explains how to build that architecture safely.
What Is OAuth Login?
OAuth login generally refers to using an OAuth-based authorization flow to allow a user to access a website through an external identity provider.
However, there is an important technical distinction.
OAuth answers:
What can this application access?
An identity protocol answers:
Who is this user?
For actual login, OpenID Connect is often the appropriate layer on top of OAuth 2.0.
OAuth vs OpenID Connect for Login
Consider:
OAuth → Authorization → Access Token → Access Protected API
while:
OpenID Connect → Authentication / Identity → ID Token → User Identity Claims
Therefore, a WordPress plugin that says:
Login With Provider
should not assume that receiving an OAuth access token alone proves who the user is.
Why the Distinction Matters
An access token is primarily an API credential.
It does not automatically mean:
"This is definitely user 123."
The provider's documented identity mechanism must be used to establish that relationship.
With OpenID Connect, the ID token provides signed identity claims that the client validates according to the provider and OIDC requirements.
Typical Login Architecture
A secure external login system can use:
Browser ↓ WordPress ↓ OAuth / OIDC Authorization ↓ Provider ↓ Authorization Code ↓ Token Endpoint ↓ ID Token / UserInfo ↓ Validate Identity ↓ WordPress User
Why External Login Is Useful
OAuth/OIDC login can provide:
Faster registration
Less password friction
Existing account authentication
Centralized identity
Reduced password-reset burden
Easier enterprise integration
Single sign-on opportunities
However, it also introduces another external dependency and therefore requires careful security design.
The Main Components
A WordPress OAuth login integration usually involves:
Browser
The user starts the login operation.
WordPress Plugin
The client initiating authorization and creating the WordPress session.
Authorization Server
The provider authenticates the user.
Identity Provider
For OIDC, the provider returns identity information.
Token Endpoint
The authorization code is exchanged for tokens.
WordPress User System
The external identity is mapped to a local WordPress account.
The Complete Login Flow
A typical authorization-code login flow is:
1. Visitor clicks "Continue With Provider" 2. WordPress creates a transaction 3. WordPress generates state 4. WordPress creates PKCE values when supported 5. Browser is redirected to provider 6. User authenticates 7. Provider returns authorization response 8. WordPress validates state 9. WordPress validates PKCE-related state 10. WordPress exchanges code 11. WordPress validates identity 12. WordPress maps external identity 13. WordPress creates or retrieves user 14. WordPress starts WordPress authentication 15. Visitor becomes logged in
Each stage matters.
Step 1: Register the Application
Before writing the login integration, register the application with the provider.
The provider usually gives:
Client ID Client Secret Authorization Endpoint Token Endpoint Redirect URI Scopes
For OIDC providers, discovery metadata may also provide information about:
Issuer JWKS URI UserInfo Endpoint Supported Scopes Supported Claims PKCE Methods
Use the provider's documentation rather than hardcoding assumptions.
Step 2: Configure the Redirect URI
A controlled callback may look like:
https://example.com/oauth/provider/callback
or a WordPress-specific endpoint.
The provider should be configured with the exact redirect URI required by its rules.
Avoid allowing the browser to determine arbitrary callback destinations.
Why Redirect URI Security Matters
A badly designed callback can create problems involving:
Authorization-code leakage
Open redirects
Authorization response injection
Incorrect account association
The redirect destination should therefore be fixed or strictly controlled.
Step 3: Start a Login Transaction
When the visitor clicks:
Continue With Provider
the plugin should create a short-lived login transaction.
The transaction may contain:
provider state PKCE verifier user/session context created_at return destination
The data should be stored securely.
Do Not Put Sensitive State Directly Into the Return URL
Avoid placing:
client_secret access_token refresh_token
in URL parameters.
URLs can appear in:
Browser history
Proxy logs
Web server logs
Analytics systems
Referrer information
Step 4: Generate state
The state value links the authorization request to the callback.
A typical flow is:
Generate Random State ↓ Store State ↓ Send State ↓ Receive State ↓ Compare ↓ Continue
RFC 9700 describes state as an important CSRF protection mechanism when PKCE or the appropriate OIDC protections are not being relied on, and recommends transaction-specific protection.
State Must Be Unpredictable
Do not use only:
user_id timestamp incrementing ID email
Generate a cryptographically strong random value.
State Should Be One-Time
After successful callback validation:
State ↓ Consumed ↓ Invalid
Do not allow the same state value to be reused indefinitely.
RFC 9700 specifically recommends invalidating state after its first use.
State Expiration
A login transaction should expire after a limited period.
For example:
Transaction Created ↓ Short Validity Window ↓ Expired
This limits replay opportunities.
Step 5: Use PKCE
PKCE stands for Proof Key for Code Exchange.
It adds another security mechanism to the authorization-code flow.
The basic sequence is:
Generate Code Verifier ↓ Create Code Challenge ↓ Send Challenge ↓ Receive Authorization Code ↓ Send Code Verifier ↓ Provider Verifies Match
RFC 9700 recommends PKCE broadly and specifically says authorization servers must support PKCE; it recommends PKCE for confidential clients as well as requiring it for public clients.
Why PKCE Helps
Suppose an attacker obtains an authorization code.
Without binding the code to the original authorization transaction, the attacker may attempt to redeem or inject the code into another flow.
PKCE binds:
Authorization Code
to:
Code Verifier
known only to the legitimate client transaction.
Generate a Code Verifier
The verifier should be cryptographically random.
Do not generate it from:
user ID timestamp email
Use a secure random source and encode it according to PKCE requirements.
Generate the Code Challenge
The common secure PKCE method is:
S256
The provider must support and enforce the corresponding challenge-verifier relationship.
RFC 9700 identifies S256 as the secure PKCE code-challenge method that does not expose the verifier in the authorization request.
Store the Verifier Securely
The WordPress application needs the original verifier after the provider sends the authorization code.
A login transaction can therefore store:
state + code_verifier
without exposing the verifier to the browser beyond the normal PKCE flow requirements.
Step 6: Build the Authorization URL
A conceptual authorization request may include:
client_id redirect_uri response_type=code scope state code_challenge code_challenge_method=S256
For OIDC, the requested scopes commonly include the identity-related scopes required by the provider.
The exact scope set and parameter requirements depend on the provider.
OIDC Scopes
For OIDC login, the application may request:
openid
and potentially additional identity scopes supported by the provider.
Examples can include profile or email data, but request only what the application actually needs.
Least Privilege for Login
If the login flow needs only identity information:
Identity + Basic Profile
avoid requesting unrelated access to:
Drive Orders Contacts Billing
unless another feature genuinely needs it.
Step 7: Redirect the Browser
WordPress redirects the browser to the provider's authorization endpoint.
The provider now controls authentication.
The user may:
Log In Approve Deny
WordPress Should Not Collect the Provider Password
This is one of the main benefits of external identity.
The WordPress plugin should redirect the user to the provider instead of asking for that provider's password itself.
Step 8: Provider Authentication
The provider may:
Check Existing Session or Request Login
and then:
Show Consent
depending on its configuration.
Step 9: Provider Redirects Back
After successful authorization, the provider redirects back with something similar to:
code state
and possibly:
iss
or provider-specific fields.
OIDC implementations can also involve identity-related response validation.
Always Handle Authorization Errors
The provider may return:
error=access_denied
The WordPress plugin should handle this gracefully.
For example:
Login was cancelled.
Do not try to redeem a missing authorization code.
Step 10: Validate the Callback
Before exchanging the code:
Callback ↓ Validate State ↓ Validate Transaction ↓ Validate Provider / Issuer Context ↓ Continue
A callback should not be trusted simply because it arrived at the correct WordPress URL.
Validate State Against the Stored Transaction
For example:
if ( ! kdr_validate_login_state( $returned_state ) ) { return new WP_Error( 'oauth_state_invalid', 'The login request could not be verified.' ); }
The actual implementation should consume the transaction after successful validation.
Step 11: Exchange the Authorization Code
The WordPress server sends:
grant_type=authorization_code code redirect_uri client_id code_verifier
and, where required for the client type:
client_secret
to the token endpoint.
The exact method and authentication mechanism are provider-specific.
Do Not Exchange the Code in Frontend JavaScript for a Confidential Client
The authorization code exchange should happen in the trusted server-side application when the architecture requires a confidential client.
This keeps client secrets out of browser code.
Step 12: Validate the Token Response
The token response may contain:
access_token token_type expires_in refresh_token scope id_token
depending on the provider and flow.
Validate the response before using or storing it.
Why Token Response Validation Matters
Do not assume:
HTTP 200
means that the response contains all required fields.
Validate:
Access Token Exists Token Type Expected ID Token Present When Required Expiration Valid
Step 13: Validate the ID Token
When using OpenID Connect, the ID token is an important source of identity information.
Do not simply:
Decode JWT ↓ Trust Payload
A signed identity token must be cryptographically validated according to the provider's OIDC requirements.
Validation commonly includes appropriate checks for:
Signature Issuer Audience Expiration Nonce
where applicable.
ID Token vs Access Token
These are different credentials.
ID Token
Carries identity claims for the client.
Access Token
Used to access protected resources.
Do not treat an access token as a substitute for validating the identity token.
User Identity Claims
An OIDC provider may provide claims such as:
sub email name picture locale
The exact claims vary.
The most important stable identifier is typically the provider's subject identifier:
sub
Do Not Use Email as the Primary External Identity Key
Email addresses can change.
A more robust mapping is:
provider + issuer + subject
or the provider's documented stable account identifier.
For example:
example-provider user-sub-12345
Why sub Matters
Suppose the user's email changes:
old@example.com
becomes:
new@example.com
The provider subject can remain stable.
This allows WordPress to keep the same external account mapping.
WordPress External Identity Mapping
A plugin can maintain a mapping such as:
Provider Issuer Subject WordPress User ID
Conceptually:
Provider A + Subject 123 → WordPress User 45
Do Not Create a New WordPress Account Every Login
A login system should first look for an existing external identity mapping.
External Identity Exists? ├── Yes → Log Into Existing User └── No → Account Creation / Linking Flow
This prevents duplicate accounts.
User Linking
A visitor may already have a WordPress account created with a password.
If they later use external login:
Existing WordPress Account + External Identity
the plugin needs a safe account-linking process.
Never Auto-Link by Email Without a Security Policy
Suppose:
Existing WordPress Account email = user@example.com
and the external provider returns:
email = user@example.com
That does not automatically prove that the user intends to link the accounts.
Automatic email linking can create account-takeover risks if identity verification assumptions are wrong.
A safer design may require:
Logged-In User ↓ Connect External Account ↓ Validate Provider Identity ↓ Link
or a carefully designed verified-email linking flow based on the provider's identity guarantees.
Login vs Account Linking
These are different workflows.
Login
Anonymous User ↓ External Identity ↓ Existing Local Account ↓ Login
Linking
Authenticated WordPress User ↓ Connect External Provider ↓ External Identity ↓ Attach to Existing Account
Do not accidentally treat one as the other.
Creating a New WordPress User
When no existing external identity exists, the plugin may offer:
Create Account
The exact account-creation policy depends on the website.
Potential fields include:
Username Email Display Name First Name Last Name
WordPress Username Generation
External providers may not provide a suitable WordPress username.
A plugin should generate one safely.
For example:
name ↓ Sanitize ↓ Check Availability ↓ Add Suffix If Needed
Do not assume usernames are globally unique across providers.
Email Validation
If using provider-supplied email information:
Validate Normalize
according to WordPress and plugin requirements.
Do not create accounts with missing or unusable identity information unless the workflow explicitly supports it.
Verified Email Is Important
If email is used for account creation or linking, the plugin should understand whether the provider actually verifies that email.
An email claim by itself is not always enough for every security-sensitive account-linking decision.
WordPress User Creation
A simplified flow can use WordPress APIs such as:
$user_id = wp_insert_user( array( 'user_login' => $username, 'user_email' => $email, 'display_name'=> $display_name, ) );
The exact registration process should include the site's account policies and appropriate validation.
Do Not Store Provider Passwords
External OAuth login should never require the WordPress plugin to know the provider user's password.
Step 14: Start the WordPress Session
After identifying or creating the WordPress user, the plugin can authenticate the user using WordPress's normal login/session mechanisms.
A common server-side pattern uses:
wp_set_auth_cookie( $user_id, true );
and can set the current user for the request.
The exact behavior should match the site's login policy, including remember-me handling.
WordPress Cookie Authentication
WordPress's built-in cookie authentication is the normal mechanism for an authenticated browser session. The REST API uses this same logged-in context for cookie-authenticated requests, with nonces added for CSRF protection.
This is different from the external provider's OAuth token.
Think of the flow as:
External Provider → Prove / establish identity WordPress → Create local authenticated session
Do Not Store the OAuth Access Token in the WordPress Login Cookie
These are separate credentials.
The browser's WordPress session cookie represents the local WordPress login.
The OAuth access token represents authorization to the external provider.
Remember Me
A plugin should respect the site's expected remember-me behavior.
Do not automatically create a persistent WordPress login if the site's login policy requires a session-only login.
Redirect After Login
After successful login:
External Provider ↓ WordPress Callback ↓ Local Login ↓ Return to Intended Page
The return destination should be validated.
Open Redirect Protection
Do not allow:
?redirect=https://malicious.example
to send the user anywhere after login.
Only allow trusted local destinations or use a controlled allowlist.
Preserving the Original Login Destination
A transaction can safely store:
return_url
and restore it after login after appropriate validation.
Avoid blindly trusting a browser-supplied URL.
Failed Login Flow
If identity validation fails:
Provider ↓ Invalid Identity ↓ No WordPress Login ↓ Safe Error
Do not create a partial account before identity validation succeeds.
Partial Account Creation
A particularly dangerous sequence is:
Create WordPress User ↓ Identity Validation Fails
Instead:
Validate Provider Identity ↓ Create / Link User
This reduces orphaned or incorrectly linked accounts.
Existing User With Different External Identity
Suppose:
WordPress User A
already exists with:
Provider Subject 123
and another provider account:
Provider Subject 999
has the same email.
Do not silently replace the external identity.
Treat external identity association as a separate relationship.
Multiple External Providers
A user may connect:
Provider A Provider B Provider C
The identity mapping can therefore be:
User 45 ├── Provider A / Subject 123 ├── Provider B / Subject 456 └── Provider C / Subject 789
This is more flexible than storing one provider identity in one user field.
Identity Mapping Table
For larger plugins, a dedicated table may look conceptually like:
id user_id provider issuer subject created_at last_login_at
Add uniqueness constraints appropriate to the provider identity model.
Why a Dedicated Table Helps
It can support:
Multiple providers
Multiple identities
Account linking
Identity lookup
Reauthentication
Auditing
without overloading wp_users.
User Meta Alternative
For smaller plugins, user metadata may sometimes be sufficient:
_provider_subject _provider_name
But multiple-provider relationships can become harder to manage cleanly.
Choose the persistence model based on scale and complexity.
Login Mapping Query
Conceptually:
Provider + Issuer + Subject ↓ WordPress User ID
This should be deterministic.
Prevent Duplicate Identity Links
The same external identity should not normally map to multiple WordPress accounts unless the provider and business model explicitly allow it.
Use uniqueness constraints where appropriate.
OAuth Login and WordPress REST API
After the user logs in, the browser can use the normal WordPress session for authenticated WordPress REST requests.
WordPress's REST API uses cookie authentication for logged-in users and requires the X-WP-Nonce mechanism for browser-based REST actions to protect against CSRF.
The external OAuth token should not be unnecessarily exposed to frontend JavaScript.
OAuth Login Does Not Replace WordPress Authorization
External login tells WordPress:
Who is this user?
WordPress still decides:
What can this user do?
Capabilities remain important.
Roles and Capabilities
A newly created user might be assigned:
subscriber
or another role according to the site's registration policy.
Do not grant:
administrator editor shop_manager
simply because the user authenticated through an external provider.
Enterprise Login
For enterprise systems, external identity can map to WordPress roles or groups.
For example:
Provider Group → WordPress Role
But role mapping must be explicitly designed.
Group and Claim Mapping
An OIDC provider may provide:
groups roles department organization
The plugin can use these values for authorization only after validating the identity token and applying a trusted mapping policy.
Do not automatically trust arbitrary claims as WordPress administrator permissions.
OAuth Login and WooCommerce
For a WooCommerce site, external login can create or link a customer account.
A common flow:
External Identity ↓ WordPress Customer ↓ WooCommerce Customer Data
Be careful with account linking and email identity.
OAuth Login and Membership Websites
Membership sites may use external identity for:
Login Registration Account Linking
but membership permissions should still be controlled locally.
OAuth Login and SaaS WordPress Plugins
For multi-tenant products:
Tenant ↓ External Identity ↓ WordPress User ↓ Tenant Membership
Do not assume an authenticated user automatically belongs to every tenant.
Tenant Membership Validation
A user can be authenticated but unauthorized for the requested tenant.
The flow should be:
Identity Valid ↓ Find WordPress User ↓ Check Tenant Membership ↓ Allow / Deny
OAuth Login and SSO
When the same identity provider is used across many applications, external login can become a single sign-on experience.
The WordPress application trusts the provider's identity protocol and creates its own local session.
SSO Session vs WordPress Session
These are different sessions.
Provider Session + WordPress Session
A user may remain logged into the provider while the WordPress session expires.
The plugin should not assume one automatically refreshes the other.
Logout Semantics
A local WordPress logout can:
End WordPress Session
without necessarily logging the user out of the external identity provider.
Single logout is a separate feature and depends on the identity protocol and provider.
Remote Logout
Do not automatically sign the user out of the external provider unless the integration explicitly supports and intends to do so.
Reauthentication
Sensitive actions may require more than simply trusting an existing WordPress session.
For example:
Change Connected Account Delete External Connection
may require the user to reauthenticate.
OAuth Login and Password Accounts
A site may support both:
Email + Password
and:
OAuth Login
The account system should clearly distinguish the authentication methods.
Account Recovery
If a user originally registered with external login:
Provider Login
and the provider is unavailable, the site's recovery strategy should be documented.
Do not automatically create a password unless the account system has a secure password-creation process.
Linking a Password to an OAuth Account
An existing OAuth-only account may optionally allow the user to set a local WordPress password.
This should be an explicit authenticated action.
OAuth Login and Email Changes
If the provider changes the user's email:
Old Email ↓ New Email
do not use email change as the primary identity mapping key.
Keep the stable provider identity.
OAuth Login and Deleted Provider Accounts
If the external account is deleted or access is revoked:
Provider → Access Removed
the WordPress account should not automatically be deleted.
Instead, decide whether the user:
Needs Reauthorization or Can Continue With Local Authentication
The business policy matters.
Access Revocation
A provider may revoke access because:
User disconnected the app
Administrator revoked consent
Organization removed access
Security event occurred
The plugin should detect authentication failures and provide a reconnect path.
Login vs API Access Revocation
Even if the user can no longer access the external API, they may still be able to use their local WordPress account.
Do not confuse the external integration state with the local user account unless the product explicitly requires that coupling.
OAuth Login Security Model
A robust flow looks like:
Browser ↓ Start Login ↓ Create Transaction ↓ State + PKCE ↓ Provider ↓ Callback ↓ Validate State ↓ Exchange Code ↓ Validate Identity ↓ Map User ↓ Authorize Local Account ↓ Set WordPress Session
Each arrow is a security boundary.
Common OAuth Login Attacks
Developers should consider:
CSRF
Authorization-code injection
Open redirects
Token leakage
Account takeover
Email-based account confusion
Session fixation
Replay
Provider mix-up
Tenant-crossing
Insufficient scope controls
Modern OAuth security guidance addresses these threats and recommends strong protections including PKCE and proper redirect/CSRF controls.
Account Takeover Through Unsafe Email Linking
A risky implementation might do:
Provider Email ↓ Find WordPress User By Email ↓ Automatically Link
without considering:
Whether the email is verified
Whether the identity provider is trusted
Whether the local account has sensitive access
Whether linking is explicitly authorized
Account linking should be treated as a privileged action.
Session Fixation Protection
After successful external login, WordPress should establish a fresh authenticated session according to its normal login mechanisms.
Do not preserve an attacker-controlled authentication state.
Authorization-Code Replay
Authorization codes should be single-use and protected through the provider and client flow.
PKCE significantly improves protection against code interception/injection, and authorization servers are required by current best practice to support PKCE.
Provider Mix-Up
If a client supports several identity providers, it should ensure the callback belongs to the expected provider/authorization server.
This can include:
issuer provider ID redirect URI transaction context
RFC 9700 recommends defenses against mix-up attacks for clients interacting with multiple authorization servers.
Multiple Providers
Suppose ThemeKaddora supports:
Provider A Provider B Provider C
Each authorization transaction should retain:
provider authorization endpoint issuer state PKCE verifier
where appropriate.
Provider Configuration
A provider adapter can define:
Authorization Endpoint Token Endpoint UserInfo Endpoint Issuer Scopes PKCE Requirements
This avoids mixing provider-specific settings.
UserInfo Endpoint
Some OIDC providers expose user identity through a UserInfo endpoint.
If used, the access token authorizes the request.
The returned claims still need validation according to the provider and OIDC rules.
Do Not Trust UserInfo More Than Necessary
Even after successful token authentication:
Validate Response ↓ Validate Identity ↓ Use Claims
Do not blindly trust arbitrary fields to determine WordPress administrator permissions.
Identity Provider Discovery
Some OIDC providers publish discovery metadata describing:
Authorization endpoint
Token endpoint
UserInfo endpoint
JWKS URI
Issuer
Supported scopes
PKCE methods
Using the provider's discovery metadata can reduce hardcoded configuration.
Key Rotation
OIDC providers can rotate signing keys.
If validating ID-token signatures:
Provider ↓ JWKS ↓ Current Signing Key
The client should support normal key rotation rather than permanently pinning one signing key without a rollover strategy.
Clock Skew
Token expiration and identity claims use timestamps.
Small differences between systems can cause borderline expiration failures.
Use a controlled clock-skew policy consistent with the provider and protocol.
OAuth Login and Caching
Do not cache user identity responses in a globally shared cache without correct isolation.
For example:
Provider Identity A
must not be returned during:
Provider Identity B
login.
For login-specific transaction data, short-lived transaction storage is preferable to generic public caching.
OAuth Login and Cookies
The external provider can establish its own browser session, while WordPress establishes a local authentication cookie after successful identity validation.
These are separate sessions.
OAuth Login and REST API
After login, WordPress REST requests inside the authenticated site can use the normal WordPress cookie + nonce model.
WordPress documents that cookie authentication is the standard built-in approach for logged-in users using the REST API, while nonces protect browser-originated REST actions against CSRF.
OAuth Login and AJAX
After the local WordPress login is established, AJAX can use WordPress's normal authenticated mechanisms.
Do not continue sending the external OAuth access token to the browser merely because it was used during login.
OAuth Login and Cron
Cron does not perform interactive login.
After a successful connection, background jobs can use the stored external authorization separately from the WordPress browser login.
OAuth Login and API Synchronization
A common SaaS flow is:
User Login ↓ OAuth Connection ↓ Store External Account ↓ Background Sync ↓ Keep WordPress Data Updated
The login session and synchronization credentials remain conceptually separate.
Do Not Put Client Secrets in Frontend Settings JavaScript
Admin pages can still render configuration securely server-side.
The client secret should not be unnecessarily exposed to browser scripts.
OAuth Login Disconnect
A user may want to:
Disconnect External Login
The plugin should make the effect clear.
For example:
External Identity Removed + Password Login Available
or:
Reauthorization Required
depending on account structure.
Prevent Lockout on Disconnect
If the user has no local password and only one external login identity, disconnecting that identity could lock the user out.
Before disconnecting, the plugin should check whether another valid login method exists.
Login Account Recovery Design
Consider:
OAuth Only → Needs Provider Password + OAuth → Two Login Paths Multiple OAuth Providers → Several Login Paths
Design recovery accordingly.
Testing Matrix
A complete OAuth login system should test:
☑ Start Login ☑ State Creation ☑ State Expiration ☑ State Mismatch ☑ PKCE Generation ☑ PKCE Validation ☑ Authorization Denial ☑ Code Exchange ☑ Invalid Code ☑ ID Token Validation ☑ Invalid Signature ☑ Wrong Issuer ☑ Wrong Audience ☑ Expired Token ☑ User Lookup ☑ New User Creation ☑ Existing User Login ☑ Account Linking ☑ Duplicate Identity ☑ Tenant Isolation ☑ Session Creation ☑ Redirect Validation ☑ Logout ☑ Reauthorization
Test Account Linking Carefully
The most important account test cases include:
Existing Local User + Same External Identity
and:
Existing Local User + Different External Identity
and:
New External Identity + Matching Email
The plugin should apply its explicit account-linking policy rather than making assumptions.
Test Provider Failure
Simulate:
Authorization Server Down Token Endpoint Down UserInfo Endpoint Down
The user should receive a controlled message.
Test Token Expiration
Simulate:
Access Token Expired
and ensure API operations either refresh successfully or move into a reauthorization state.
Test Revoked Access
Simulate:
Provider Revokes Consent ↓ API Returns Unauthorized
The WordPress integration should detect the condition and provide a reconnect path.
Test Concurrent Login Attempts
The same user may open several login windows.
Each login transaction should have isolated:
State PKCE Verifier Return Destination
Do not rely on one global temporary value.
Avoid One Global OAuth State
This is unsafe:
global_oauth_state
because two simultaneous login attempts can overwrite each other.
Use transaction-specific state.
Error Messages
Good visitor-facing messages include:
Login was cancelled. Unable to connect the external account. The identity provider is temporarily unavailable. Your connection needs to be authorized again.
Avoid displaying raw:
Access Token Client Secret JWT Stack Trace
Logging OAuth Login Errors
Useful operational fields:
Provider Transaction ID User Context Tenant Context Stage Error Code HTTP Status Timestamp
Never log:
Authorization Code Access Token Refresh Token Client Secret
Monitoring OAuth Login
Monitor:
Login Attempts Login Success Rate State Failures PKCE Failures Token Exchange Failures Identity Validation Failures Account Creation Failures Reauthorization Rate Provider Availability
A sudden increase in one stage can identify where the integration is failing.
OAuth Login and Performance
Do not make the callback perform unnecessary heavy work.
A good sequence is:
Callback ↓ Validate ↓ Exchange ↓ Validate Identity ↓ Create / Find User ↓ Log In ↓ Redirect
Heavy synchronization should happen afterward in the background.
OAuth Login and Background Sync
After a successful first login:
Login ↓ Queue Initial Sync
rather than:
Login ↓ Download 100,000 Records ↓ Then Log In
This keeps authentication fast.
OAuth Login and Initial Account Provisioning
If the site needs external profile data:
Identity ↓ Create Minimal User ↓ Login ↓ Background Enrichment
may provide a better experience than performing every integration task synchronously.
OAuth Login and Provisioning
Enterprise login may need:
User ↓ Role Mapping ↓ Group Mapping ↓ Tenant Membership
This should be explicit and auditable.
Do Not Trust Role Claims Blindly
A provider may return a claim such as:
role = admin
but your WordPress application should only map that value to privileged permissions if the provider, issuer, claim, and mapping configuration are trusted.
External identity does not automatically grant WordPress administrator privileges.
Account Locking
If local WordPress security policies lock a user account, external login should not necessarily bypass those policies.
The local authorization layer remains important.
WordPress Capability Checks After OAuth Login
After the user is authenticated:
current_user_can()
should still control privileged actions.
External login does not replace WordPress capabilities.
OAuth Login and Application Passwords
Application Passwords serve a different purpose.
WordPress documents Application Passwords as a mechanism for authenticating programmatic REST API access to a WordPress site. They are not the same as an external OAuth login system.
OAuth Login vs WordPress Cookie Authentication
External OAuth/OIDC establishes or verifies external identity.
WordPress cookies maintain the resulting local browser login.
Think:
External Provider → Identity WordPress → Session
OAuth Login vs JWT
JWT can be used in authentication architectures, but it is not automatically required for OAuth login.
Use the protocol architecture appropriate to the provider and product.
OpenID Connect Is Often Better for Login
When the goal is user authentication, use an identity protocol such as OIDC when supported.
This gives the application an explicit identity layer instead of treating an access token as proof of identity.
Example Class Structure
includes/ ├── OAuth/ │ ├── Client.php │ ├── StateManager.php │ ├── PkceManager.php │ ├── TokenStore.php │ └── IdentityValidator.php ├── Login/ │ ├── Controller.php │ ├── UserMapper.php │ └── SessionManager.php ├── Providers/ │ └── ProviderAdapter.php └── Identity/ └── IdentityRepository.php
The exact folder structure can vary.
OAuth Client Responsibilities
The OAuth client manages:
Authorization URL Code Exchange Token Refresh Provider Configuration
Identity Validator Responsibilities
The identity validator manages:
ID Token Issuer Audience Expiration Nonce Signature Claims
when applicable to the OIDC provider.
User Mapper Responsibilities
The mapper converts:
External Identity
into:
WordPress User
without putting WordPress account logic into the OAuth protocol layer.
Session Manager Responsibilities
The session manager handles:
WordPress Authentication Remember Me Redirect
after identity verification has succeeded.
Identity Repository Responsibilities
The repository handles:
Find External Identity Create Mapping Delete Mapping Update Last Login
This keeps identity relationships separate from protocol code.
Dependency Injection
A login service might receive:
$login_service = new KDR_OAuth_Login_Service( $oauth_client, $identity_repository, $user_mapper, $session_manager );
This makes the system easier to test.
Why Layering Matters
Without layering:
Callback ↓ OAuth ↓ Database ↓ User Creation ↓ Session ↓ Redirect
all inside one large function.
With layering:
Callback ↓ OAuth Service ↓ Identity Validator ↓ User Mapper ↓ Session Manager
Each component can be tested independently.
Why choose ThemeKaddora?
ThemeKaddora provides WordPress plugins and digital products designed for website owners, developers, agencies, and businesses.
Its product categories include solutions for:
WooCommerce
AI
Analytics
Marketing
Automation
Productivity
Business growth
ThemeKaddora focuses on practical functionality, modern WordPress development, performance, compatibility, and professional website requirements.
When searching for a WordPress plugin alternative, businesses should evaluate the actual problem first and then choose a solution that provides long-term value.
Conclusion
Building OAuth login with WordPress requires much more than adding a "Login With Provider" button.
The complete architecture combines:
OAuth Authorization
→ PKCE
→ State Validation
→ Identity Validation
→ Account Mapping
→ WordPress Session Creation
→ Local Authorization
The most important conceptual distinction is:
OAuth provides delegated authorization; for user login, use an identity layer such as OpenID Connect when the provider supports it.
This prevents a common architectural mistake: treating an access token as if it were automatically proof of a user's identity.
The login process should instead be:
External Provider ↓ Authenticated User ↓ Authorization ↓ Identity Result ↓ Validated External Subject ↓ WordPress User ↓ Local Session
Security begins before the user reaches the provider.
Generate:
State + PKCE
and bind them to the specific login transaction.
Modern OAuth security guidance recommends PKCE broadly and emphasizes protection against authorization-code injection, CSRF, redirect attacks, and provider mix-up.
The callback must not simply trust:
code
Validate:
State Transaction Provider Context PKCE
before exchanging the code.
After the code exchange, validate identity.
For OIDC:
ID Token ↓ Signature ↓ Issuer ↓ Audience ↓ Expiration ↓ Nonce ↓ Claims
according to the provider's OIDC requirements.
Do not use email as the only external identity key.
Prefer a stable identity identifier such as:
Issuer + Subject
Then map it to:
WordPress User ID
For example:
Provider A + Subject 123 → WordPress User 45
This allows the provider email to change without automatically creating a new account.
Account linking requires extra caution.
Do not blindly perform:
External Email ↓ Existing WordPress Email ↓ Auto-Link
because an unsafe linking rule can create account-takeover risks.
Instead, make account linking an explicit security decision.
For multiple providers, maintain separate identity mappings:
WordPress User 45 ├── Provider A / Subject 123 ├── Provider B / Subject 456 └── Provider C / Subject 789
For multi-tenant SaaS:
Tenant A → Identity A → User A Tenant B → Identity B → User B
Authentication must still be followed by authorization.
A successfully authenticated user does not automatically become an administrator.
The local WordPress authorization model remains responsible for:
Roles Capabilities Tenant Membership Business Permissions
WordPress's REST API itself relies on normal logged-in cookie authentication for browser sessions and uses nonces for CSRF protection on cookie-authenticated REST requests.
After successful external login, the plugin can establish the WordPress session with the site's normal authentication mechanisms.
The OAuth token should not be placed into that session cookie or exposed to frontend JavaScript merely because it was used during the login process.
The integration should also handle the complete account lifecycle:
Login ↓ Connected ↓ Token Refresh ↓ Provider Access ↓ Revocation ↓ Reauthorization ↓ Disconnect
If provider access is revoked, the plugin should distinguish:
External Integration Lost
from:
Local WordPress Account Deleted
These are not automatically the same event.
For ThemeKaddora products, a reusable login architecture can be:
Login Page │ ▼ Login Controller │ ▼ OAuth / OIDC Manager │ ┌──────┴──────┐ ▼ ▼ State PKCE │ │ └──────┬──────┘ ▼ Identity Provider │ ▼ Callback │ ▼ Identity Validator │ ▼ External Identity Map │ ▼ WordPress User │ ▼ Authorization Check │ ▼ WordPress Session
This architecture can support:
Social login
Enterprise SSO
CRM login
SaaS identity
OIDC login
Multiple providers
Account linking
without mixing protocol handling with WordPress user-management logic.
A strong implementation should also support:
State Expiration + PKCE + Identity Validation + Stable Subject Mapping + Account Linking Controls + Tenant Isolation + Safe Redirects + Session Security + Reauthorization
The most important principle is:
Never let "successful OAuth authorization" automatically become "trusted WordPress identity." Validate the authorization transaction, validate the identity, map the external subject safely, then create or authenticate the local WordPress user.
A professional WordPress OAuth login system should be:
Secure
→ Identity-Aware
→ PKCE-Protected
→ CSRF-Resistant
→ Account-Linking-Safe
→ Tenant-Aware
→ Capability-Aware
→ Recoverable
→ Observable
→ Testable
When these principles are followed, OAuth login can provide a smooth user experience without turning the external identity provider into an uncontrolled shortcut around WordPress's own authentication and authorization model.
Frequently Asked Questions
What is OAuth login in WordPress?
OAuth login is an external authentication integration where users authorize an identity provider and WordPress uses the resulting identity to find, create, or authenticate a local WordPress account.
Is OAuth the same as OpenID Connect?
No. OAuth is primarily an authorization framework. OpenID Connect adds an identity layer designed for authentication and user identity claims.
Should I use OAuth or OIDC for login?
When the provider supports OpenID Connect, OIDC is generally the more appropriate identity layer for user login. OAuth can then be used as the authorization mechanism beneath it.
What is PKCE?
PKCE is Proof Key for Code Exchange. It binds an authorization code to a transaction-specific verifier and is an important protection for modern authorization-code flows.
Do I still need state when using PKCE?
The exact requirement depends on the flow and provider. Current OAuth security guidance strongly emphasizes transaction-specific CSRF protection and supports PKCE as a major defense; when relying on state, it must be securely bound and validated.
Can I use a user's email as the external identity key?
It is safer to use a stable provider identity such as the issuer and subject identifier. Email addresses can change.
Should I automatically link an OAuth account to an existing WordPress account by email?
Not without a carefully designed security policy. Unsafe automatic account linking can create account-takeover risks.
What happens after OAuth authentication succeeds?
The plugin validates the external identity, finds or creates the appropriate WordPress user, checks local authorization rules, and then establishes the normal WordPress login session.
Does the OAuth access token become the WordPress login session?
No. The external access token and the local WordPress authentication session are separate credentials serving different purposes.
Why choose Themekaddora?
Themekaddora provides lightweight, responsive, SEO-friendly WordPress themes with fast performance, WooCommerce compatibility, flexible customization, accessibility-conscious design, modern templates, regular updates, and professional support—providing a strong foundation for businesses building digital products and product-focused websites.
Comments (0)