
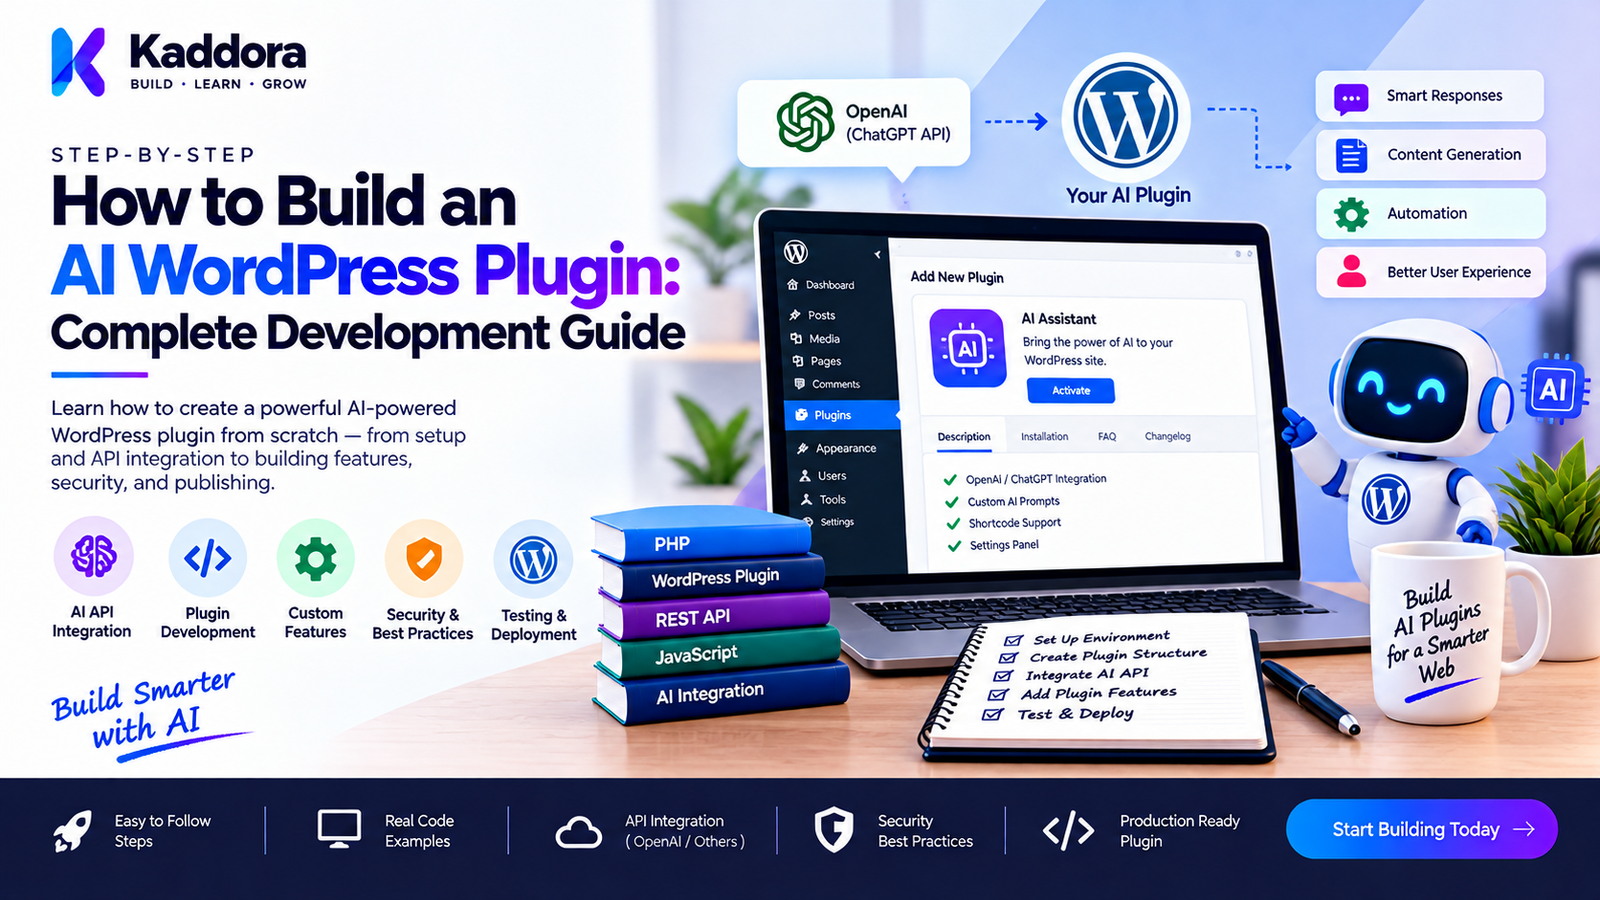
How to Build an AI WordPress Plugin: Complete Development Guide
Introduction
Artificial intelligence is becoming an increasingly useful component of WordPress websites. Developers can integrate AI into plugins to automate repetitive tasks, generate content, analyze information, improve search, assist customers, process images, and create intelligent workflows.
Building an AI WordPress plugin, however, requires more than connecting an API.
A reliable AI plugin should combine traditional WordPress development practices with:
AI API integration
Secure authentication
Prompt design
Input validation
Response validation
Error handling
Privacy controls
Performance optimization
Rate limiting
Caching
Background processing
User-friendly interfaces
The goal is to create a WordPress plugin where AI is one component of a well-designed system.
This guide explains how to build an AI WordPress plugin from the initial idea through architecture, API integration, security, testing, and deployment.
What Is an AI WordPress Plugin?
An AI WordPress plugin is a WordPress plugin that uses artificial intelligence to provide functionality that would traditionally require predefined rules, manual work, or additional processing.
For example, a traditional content plugin might work like this:
WordPress Content ↓ Predefined Rules ↓ Fixed Processing ↓ Result
An AI-powered plugin may work like this:
WordPress Content ↓ Plugin ↓ AI Service ↓ AI Model ↓ Generated / Analyzed Result ↓ WordPress
AI plugins can support many different use cases.
Common AI Plugin Features
AI content generation
AI writing assistance
AI SEO recommendations
AI chatbots
Customer support
AI search
Semantic search
Product descriptions
Product recommendations
Image analysis
Image alt text
Translation
Summarization
Data classification
Lead generation
Workflow automation
Personalized content
Why Build an AI WordPress Plugin?
WordPress already provides a large ecosystem of plugins, themes, APIs, and content management features.
Adding AI can extend these capabilities.
For example, a WooCommerce plugin could automatically generate product descriptions.
A support plugin could answer frequently asked questions.
An SEO plugin could analyze content and suggest improvements.
An image plugin could generate descriptive alt text.
An internal search plugin could understand natural-language queries.
The key is to identify a genuine problem before selecting an AI feature.
Step 1: Define the AI Plugin's Purpose
The first step is defining exactly what your plugin should accomplish.
Avoid starting with:
"I want to build an AI plugin."
Instead define a specific objective.
For example:
"The plugin will generate WooCommerce product descriptions from existing product information."
Or:
"The plugin will answer customer questions using the website's documentation."
Or:
"The plugin will generate SEO recommendations from WordPress content."
A clear objective makes the rest of the architecture easier to design.
Step 2: Choose the AI Feature
Different AI features require different architectures.
AI Content Generation
User Input ↓ Prompt ↓ AI API ↓ Generated Content
AI Chatbot
Visitor ↓ Chat Interface ↓ Knowledge Retrieval ↓ AI API ↓ Response
AI Image Analysis
Image ↓ AI Vision Service ↓ Analysis ↓ WordPress
AI Search
Search Query ↓ AI Processing ↓ Semantic Interpretation ↓ WordPress Search ↓ Results
The feature determines the architecture.
Step 3: Plan the Plugin Architecture
Before writing code, define the main components.
A practical AI plugin architecture could look like:
AI WordPress Plugin │ ├── Bootstrap ├── Admin ├── Settings ├── AI Service ├── API Client ├── Prompt Manager ├── Response Handler ├── Security ├── Cache ├── Background Processing └── Feature Modules
Each component should have a clear responsibility.
For a small plugin, you do not need unnecessary abstraction.
The architecture should grow according to the actual complexity of the project.
Step 4: Create the WordPress Plugin
Start with the standard WordPress plugin structure.
For example:
my-ai-plugin/ │ ├── my-ai-plugin.php ├── includes/ ├── admin/ ├── assets/ ├── languages/ └── uninstall.php
The main plugin file can be responsible for bootstrapping the plugin.
Avoid putting the entire AI implementation inside the main plugin file.
Step 5: Create a Plugin Bootstrap
The bootstrap should initialize the plugin in a controlled way.
A conceptual flow is:
WordPress Loads Plugin ↓ Plugin Bootstrap ↓ Load Dependencies ↓ Register Services ↓ Register Hooks ↓ Initialize Features
This keeps initialization predictable.
For larger plugins, feature modules can be initialized independently.
Step 6: Create an AI Service
The AI service should contain AI-related business logic.
For example:
class MyPlugin_AI_Service { public function generate( $prompt ) { // AI processing. } }
The admin page should not need to know how the external AI provider works.
Instead:
Admin ↓ AI Service ↓ API Client ↓ Provider
This separation also makes it easier to change providers later.
Step 7: Create an API Client
The API client should handle communication with the external AI service.
Its responsibilities may include:
API endpoint
Authentication
Request headers
Request body
HTTP request
HTTP response
Provider errors
A conceptual structure is:
AI Service ↓ API Client ↓ HTTP Request ↓ AI Provider
This prevents provider-specific code from being spread throughout the plugin.
Step 8: Use the WordPress HTTP API
WordPress provides HTTP API functionality for communicating with external services.
For example:
$response = wp_remote_post( $endpoint, array( 'headers' => $headers, 'body' => $body, 'timeout' => 30, ) );
The exact request should depend on the AI provider's current API documentation.
After making the request, always check whether the request succeeded before processing the returned data.
Step 9: Secure the AI API Key
Never expose a private AI API key in front-end JavaScript.
Avoid:
Browser ↓ Private API Key ↓ AI Provider
Prefer:
Browser ↓ WordPress ↓ Plugin ↓ AI Provider
The API credential should remain server-side.
Plugin settings should also be protected using appropriate WordPress capabilities.
Step 10: Create an AI Settings Page
An AI plugin will commonly need an administration screen.
Possible settings include:
AI provider
API key
Model
Request limits
Output limits
AI feature toggle
Logging
Cache duration
A basic interface could look like:
AI Plugin Settings AI Provider [ Provider ] API Key [ **************** ] Model [ Selected Model ] AI Features [ Enabled ] [Save Settings]
Only authorized administrators should be able to modify these settings.
Step 11: Validate Plugin Settings
Do not blindly save settings submitted from an administrator interface.
For each setting:
Input ↓ Validate ↓ Sanitize ↓ Save
The validation method should match the data type.
For example:
Boolean settings
Integer settings
URLs
Text
API credentials
Model identifiers
should be handled appropriately.
Step 12: Design the Prompt System
Prompts are an important part of an AI plugin.
Instead of scattering prompts throughout your code, consider organizing them into a dedicated prompt layer.
For example:
Prompt Manager │ ├── Content Prompt ├── SEO Prompt ├── Product Prompt ├── Support Prompt └── Search Prompt
This makes prompts easier to maintain.
Step 13: Build Structured Prompts
A useful prompt can contain:
Role Context Task Input Rules Output Format
For example:
Task: Create a concise product description. Context: The product information comes from WooCommerce. Rules: - Do not invent specifications. - Use clear language. - Focus on provided product information. - Avoid unsupported claims. Output: Return the product description only.
Structured prompts make the intended behavior clearer.
Step 14: Treat User Content as Untrusted Data
AI plugins often process user-generated information.
For example:
Website Content Customer Message Product Description Support Question Uploaded Document
These inputs should not automatically be treated as trusted instructions.
Separate:
Plugin Instructions
from:
User Data
This is particularly important when building chatbots, AI search, knowledge bases, and document-processing features.
Step 15: Validate AI Responses
AI output should never be assumed to be correct simply because the API returned a successful response.
Suppose the plugin expects:
{ "title": "Example", "summary": "Example summary" }
The plugin should verify:
Required fields exist.
Data types are correct.
Values are not empty.
Content stays within expected limits.
The returned structure matches the expected format.
If the response is invalid, the plugin should handle the error instead of continuing blindly.
Step 16: Sanitize and Escape AI Output
AI output must be handled appropriately before being displayed or stored.
For example:
AI Response ↓ Validate ↓ Sanitize if required ↓ Escape for Output ↓ Display
If HTML is intentionally supported, use an appropriate WordPress sanitization method.
Never assume AI-generated content is automatically safe.
Step 17: Add WordPress Permissions
AI features should respect WordPress capabilities.
For example, if only administrators should generate content, the plugin should check the appropriate capability before performing the operation.
A secure flow is:
User Request ↓ Authentication ↓ Capability Check ↓ Nonce Verification ↓ Input Validation ↓ AI Request
Security checks should happen before the expensive external request.
Step 18: Add Nonce Verification
For WordPress admin actions and applicable requests, use WordPress nonce mechanisms to help protect against unauthorized requests.
For example:
Form Submission ↓ Nonce Verification ↓ Capability Check ↓ Process Request
Nonces are one part of WordPress security and should not replace capability checks.
Step 19: Add Error Handling
External AI services can fail.
Possible problems include:
Invalid API credentials
Rate limits
Network failures
Timeouts
Invalid requests
Unsupported models
Provider outages
Invalid responses
A good plugin should provide useful error messages.
For example:
AI request could not be completed. Please check your API configuration and try again.
Technical details can be logged separately where appropriate.
Step 20: Add Timeouts
Do not allow external requests to wait indefinitely.
AI APIs are external services, so the plugin should define reasonable timeout behavior.
For example:
Plugin Request ↓ AI API ↓ Timeout Limit
If the provider does not respond within an acceptable period, the plugin should fail gracefully.
Step 21: Add Caching
Caching can reduce unnecessary AI requests.
Without caching:
User Request ↓ AI API ↓ Result
With caching:
User Request ↓ Cache ↙ ↘ Hit Miss ↓ ↓ Result AI API ↓ Cache
Caching can reduce:
API usage
Costs
Response time
Server load
The cache strategy should match the feature.
Step 22: Add Rate Limiting
An AI plugin can become expensive or vulnerable to abuse if users can send unlimited requests.
A plugin can implement limits such as:
Requests per minute
Requests per user
Requests per IP
Requests per operation
Daily request limits
For public-facing AI tools, rate limiting is particularly important.
Step 23: Use Background Processing for Bulk AI Tasks
Suppose a WooCommerce website has 10,000 products and the plugin needs to generate descriptions.
Running all requests in a single page request is not a good approach.
Instead:
10,000 Products ↓ Queue ↓ Background Worker ↓ AI API ↓ Save Result ↓ Next Product
Background processing can prevent timeouts and improve reliability.
Step 24: Add Job Status Tracking
For long-running operations, users should be able to see progress.
For example:
AI Product Processing Completed: 325 Remaining: 675 Failed: 12 [View Details]
Useful states include:
Pending
Processing
Completed
Failed
Cancelled
This makes bulk AI features much easier to manage.
Step 25: Design Human Review Workflows
AI should not always publish or modify information automatically.
A safer content workflow is:
Generate ↓ Review ↓ Edit ↓ Approve ↓ Publish
This is useful for:
Blog content
Product descriptions
SEO metadata
Customer responses
Marketing content
Human review provides an additional quality-control layer.
Step 26: Integrate AI With WooCommerce
WooCommerce provides many opportunities for AI functionality.
For example:
WooCommerce Product ↓ Product Data ↓ AI Processing ↓ Generated Description ↓ Merchant Review ↓ Save Product
Possible features include:
Product descriptions
Product summaries
Product categorization
Recommendations
Upselling
Cross-selling
Alt text
Search assistance
Customer support
Step 27: Integrate AI With WordPress Content
AI can also work with WordPress posts and pages.
For example:
Post ↓ AI Analysis ↓ Recommendations
Possible functionality includes:
Summaries
Rewriting
Headline suggestions
SEO descriptions
Content outlines
Readability improvements
Translation
The plugin should clearly define whether AI output is a draft or an automatic modification.
Step 28: Build an AI Chatbot
An AI chatbot requires additional components.
A basic architecture is:
Visitor ↓ Chat Interface ↓ WordPress Endpoint ↓ Validation ↓ Knowledge Retrieval ↓ AI Service ↓ AI Provider ↓ Response ↓ Visitor
If the chatbot uses website documentation, the plugin can retrieve relevant information before generating the response.
Step 29: Add a Knowledge Base
An AI plugin can use website information as a knowledge source.
For example:
WordPress Pages Posts Documentation FAQs Products ↓ Knowledge Layer ↓ Relevant Information ↓ AI
This can be useful for:
Support chatbots
Documentation assistants
Product assistants
Internal search
FAQ systems
The plugin should ensure that retrieved content is relevant and appropriately scoped.
Step 30: Consider Prompt Injection
AI systems can be manipulated by specially crafted input.
For example, a document or user message could contain instructions intended to change the AI's behavior.
A safer architecture separates:
System / Plugin Instructions
from:
Retrieved Content
and:
User Input
The plugin should also validate the final AI output before using it for important actions.
Step 31: Prevent AI From Bypassing Business Rules
AI should not replace normal WordPress permissions and business logic.
For example, do not allow an AI response to directly:
Delete users
Change administrator privileges
Change product prices
Execute arbitrary PHP
Send unrestricted bulk email
Process financial transactions
Instead:
AI Recommendation ↓ Validation ↓ Business Rules ↓ Permission Check ↓ Action
This keeps AI inside the plugin's security boundaries.
Step 32: Optimize AI API Costs
AI requests can become expensive when poorly designed.
Cost optimization techniques include:
Caching results
Avoiding duplicate requests
Limiting input size
Limiting output size
Processing only changed content
Using background jobs
Allowing administrators to configure usage
Tracking request consumption
A plugin should not make an AI request when a previously generated result can be safely reused.
Step 33: Add Usage Monitoring
A commercial or large-scale AI plugin can benefit from an AI usage dashboard.
For example:
AI Usage Requests: 2,450 Successful: 2,398 Failed: 52 Average Response Time: 2.4s
Additional metrics can include:
Feature usage
Request volume
Error rates
Processing time
Estimated API consumption
Monitoring helps identify performance and cost problems.
Step 34: Consider Privacy
AI plugins may send WordPress information to external services.
Before transmitting information, determine:
What data is being sent?
Why is it being sent?
Is the data necessary?
Is personal information included?
How does the provider handle the data?
For example:
Customer Message ↓ WordPress ↓ External AI Provider
The plugin should minimize unnecessary information transmission and provide appropriate documentation and controls.
Step 35: Test the AI Plugin
Testing should cover both successful and failed scenarios.
Test API Authentication
Verify that valid credentials work and invalid credentials fail gracefully.
Test Input Validation
Submit empty, oversized, malformed, and unexpected input.
Test API Failures
Simulate:
Timeout
Rate limit
Invalid request
Provider failure
Test Response Validation
Verify that malformed or incomplete responses do not break the plugin.
Test Permissions
Ensure unauthorized users cannot access protected AI functionality.
Test Bulk Processing
Test background processing with a realistic amount of data.
Step 36: Test Different WordPress Environments
An AI plugin should be tested across appropriate environments.
Consider:
Different PHP versions
Different WordPress versions
Different hosting environments
Different caching configurations
WooCommerce installations where applicable
Different user roles
Compatibility testing can identify problems before release.
Step 37: Optimize the User Experience
AI operations can take longer than ordinary WordPress actions.
A good interface should show clear states:
Ready ↓ Processing ↓ Completed
or:
Ready ↓ Processing ↓ Error
Useful UI elements include:
Loading indicators
Progress information
Error messages
Retry actions
Cancel options
Generated-content previews
Users should understand what the plugin is doing.
Step 38: Document the AI Plugin
Good documentation should explain:
Installation
Configuration
API setup
AI provider requirements
Available features
Usage limits
Privacy considerations
Troubleshooting
Error messages
Frequently asked questions
AI integrations often require additional configuration compared with ordinary WordPress plugins.
Step 39: Prepare the Plugin for Updates
AI providers can change:
Models
APIs
Request formats
Authentication methods
Pricing
Limits
Therefore, the plugin should isolate provider-specific code where practical.
For example:
Plugin Features ↓ AI Service ↓ Provider Adapter ↓ AI Provider
This makes provider changes easier to manage.
Step 40: Build a Maintainable AI Plugin
A maintainable AI plugin should keep responsibilities separated.
A practical architecture could look like:
Plugin │ ├── Bootstrap │ ├── Admin │ ├── Settings │ ├── AI Service │ ├── API Client │ ├── Prompt Manager │ ├── Response Validator │ ├── Cache │ ├── Queue │ └── Feature Modules
Not every plugin needs every component.
The architecture should reflect the actual requirements of the project.
Example AI WordPress Plugin Structure
A more complete plugin could use:
my-ai-plugin/ │ ├── my-ai-plugin.php │ ├── includes/ │ ├── class-plugin.php │ ├── class-settings.php │ ├── class-ai-service.php │ ├── class-api-client.php │ ├── class-prompt-manager.php │ ├── class-response-validator.php │ ├── class-cache.php │ └── class-background-processor.php │ ├── admin/ │ ├── class-admin.php │ ├── views/ │ └── assets/ │ ├── assets/ │ ├── css/ │ └── js/ │ ├── languages/ │ └── uninstall.php
For a small AI plugin, this can be simplified.
For a large commercial plugin, separating these responsibilities can improve maintainability.
Common Mistakes When Building AI WordPress Plugins
1. Putting Everything in One File
Large AI integrations quickly become difficult to maintain when every feature is placed in the main plugin file.
2. Exposing API Keys
Private API credentials should never be exposed to visitors.
3. Trusting AI Output
AI output should be validated before being used.
4. Ignoring API Costs
Uncontrolled requests can increase expenses.
5. Making AI Requests on Every Page Load
This can negatively affect performance and increase API usage.
6. Ignoring Rate Limits
External AI providers can restrict excessive requests.
7. Skipping Permission Checks
AI features should respect WordPress user capabilities.
8. Automatically Publishing Everything
AI-generated content should often go through a review process.
9. Ignoring Privacy
User information should not be transmitted unnecessarily.
10. Building Provider-Specific Code Everywhere
Centralizing provider communication makes future maintenance easier.
AI WordPress Plugin Security Checklist
Before releasing your plugin, verify:
API keys are protected.
Admin capabilities are checked.
Nonces are used where applicable.
Input is validated.
Output is escaped or sanitized appropriately.
REST endpoints are protected.
AI responses are validated.
Rate limiting is considered.
External requests have sensible timeouts.
Sensitive information is not unnecessarily logged.
AI cannot bypass business rules.
User data transmission is documented.
AI WordPress Plugin Performance Checklist
Verify that:
AI requests are not made unnecessarily.
Reusable results can be cached.
Large operations use background processing.
Request sizes are controlled.
Response sizes are controlled.
Timeouts are handled.
API failures do not break the entire website.
Long-running jobs provide progress information.
When Should You Build an AI WordPress Plugin?
Building an AI plugin makes sense when AI can solve a meaningful problem for WordPress users.
Good opportunities include:
Repetitive content creation
Intelligent search
Customer support
Product recommendations
Content analysis
Image processing
Data classification
Workflow automation
Personalization
Marketing assistance
A simple WordPress feature may be preferable when AI does not provide a meaningful improvement.
The objective should be solving a user problem rather than adding AI for its own sake.
Why Choose Kaddora?
Kaddora focuses on WordPress plugins, themes, templates, and business-oriented website solutions.
Building an AI WordPress plugin requires a combination of WordPress development knowledge and modern AI integration practices. A useful AI plugin should not only connect to an AI provider but also provide secure configuration, reliable processing, appropriate validation, performance optimization, and a practical user experience.
ThemeKaddora covers WordPress-focused solutions across areas such as:
AI
WordPress plugins
WordPress themes
WooCommerce
SEO
Automation
Analytics
Website templates
Business tools
For developers and businesses building AI-powered WordPress solutions, a structured approach can make AI functionality easier to maintain, expand, and integrate with existing WordPress workflows.
Conclusion
Building an AI WordPress plugin requires more than connecting an AI API to a button.
A production-ready plugin should combine:
A clear AI use case
A maintainable WordPress architecture
Secure API integration
Protected credentials
Structured prompts
Input validation
Response validation
Permission checks
Error handling
Rate limiting
Caching
Background processing
Privacy considerations
Performance optimization
Human review where appropriate
The best AI plugins focus on a specific problem and integrate artificial intelligence into an existing WordPress workflow in a controlled way.
Whether you are building an AI content assistant, chatbot, WooCommerce tool, SEO plugin, search system, or automation solution, the same fundamental principles apply: keep the architecture clean, protect user data, validate AI output, control API usage, and make the AI feature useful to the people using the plugin.
With a well-planned architecture, WordPress can serve as a strong foundation for building modern AI-powered plugins.
Frequently Asked Questions
What is an AI WordPress plugin?
An AI WordPress plugin is a WordPress plugin that uses an AI model or AI service to provide functionality such as content generation, search, recommendations, automation, customer support, or data analysis.
How do I start building an AI WordPress plugin?
Start by defining one specific problem that AI should solve. Then design the plugin architecture, select an AI provider, create secure API communication, implement the feature, and test the complete workflow.
Do I need programming knowledge to build an AI WordPress plugin?
Yes. Building a production-ready plugin generally requires knowledge of PHP, WordPress hooks, APIs, security, HTTP requests, JavaScript where applicable, and AI API integration.
Can I build an AI plugin using PHP?
Yes. WordPress plugins are commonly developed with PHP, and PHP can communicate with external AI APIs through WordPress's HTTP API.
Can an AI WordPress plugin use the WordPress REST API?
Yes. A plugin can create REST API endpoints for AI functionality, provided the endpoints implement appropriate authentication, authorization, validation, and security controls.
How do I connect an AI API to WordPress?
A typical approach is to create an AI service and API client that use the WordPress HTTP API to communicate with the AI provider.
Where should I store the AI API key?
The API key should remain server-side and should not be exposed through front-end JavaScript. Plugin configuration should also be protected with appropriate WordPress permissions.
Can an AI plugin generate WordPress posts?
Yes. An AI plugin can generate draft content, titles, summaries, descriptions, and other content. A review workflow can allow administrators to verify the generated material before publishing.
How can I reduce AI API costs?
Caching, request limits, smaller inputs, smaller outputs, avoiding duplicate requests, and background processing can help reduce unnecessary AI API usage.
How do I make an AI WordPress plugin secure?
Protect API credentials, validate input, verify permissions, use nonces where applicable, protect REST endpoints, validate AI responses, escape output, implement rate limiting where appropriate, and prevent AI output from bypassing business rules.
Should AI-generated content be published automatically?
Not necessarily. For many use cases, generating a draft and allowing a human to review it provides an additional quality-control step.
Can an AI plugin work without sending data to an external provider?
It depends on the AI architecture. Some AI implementations can use locally hosted or self-hosted models, while many plugins use external AI APIs. The architecture and infrastructure requirements differ significantly.
How can I prevent AI from making dangerous changes?
Do not allow raw AI output to directly execute sensitive actions. Validate the output, apply business rules, verify permissions, and require human approval for high-impact operations where appropriate.
Why choose Themekaddora?
Themekaddora provides lightweight, responsive, SEO-friendly WordPress themes with fast performance, WooCommerce compatibility, flexible customization, accessibility-conscious design, modern templates, regular updates, and professional support—providing a strong foundation for businesses building digital products and product-focused websites.
Comments (0)