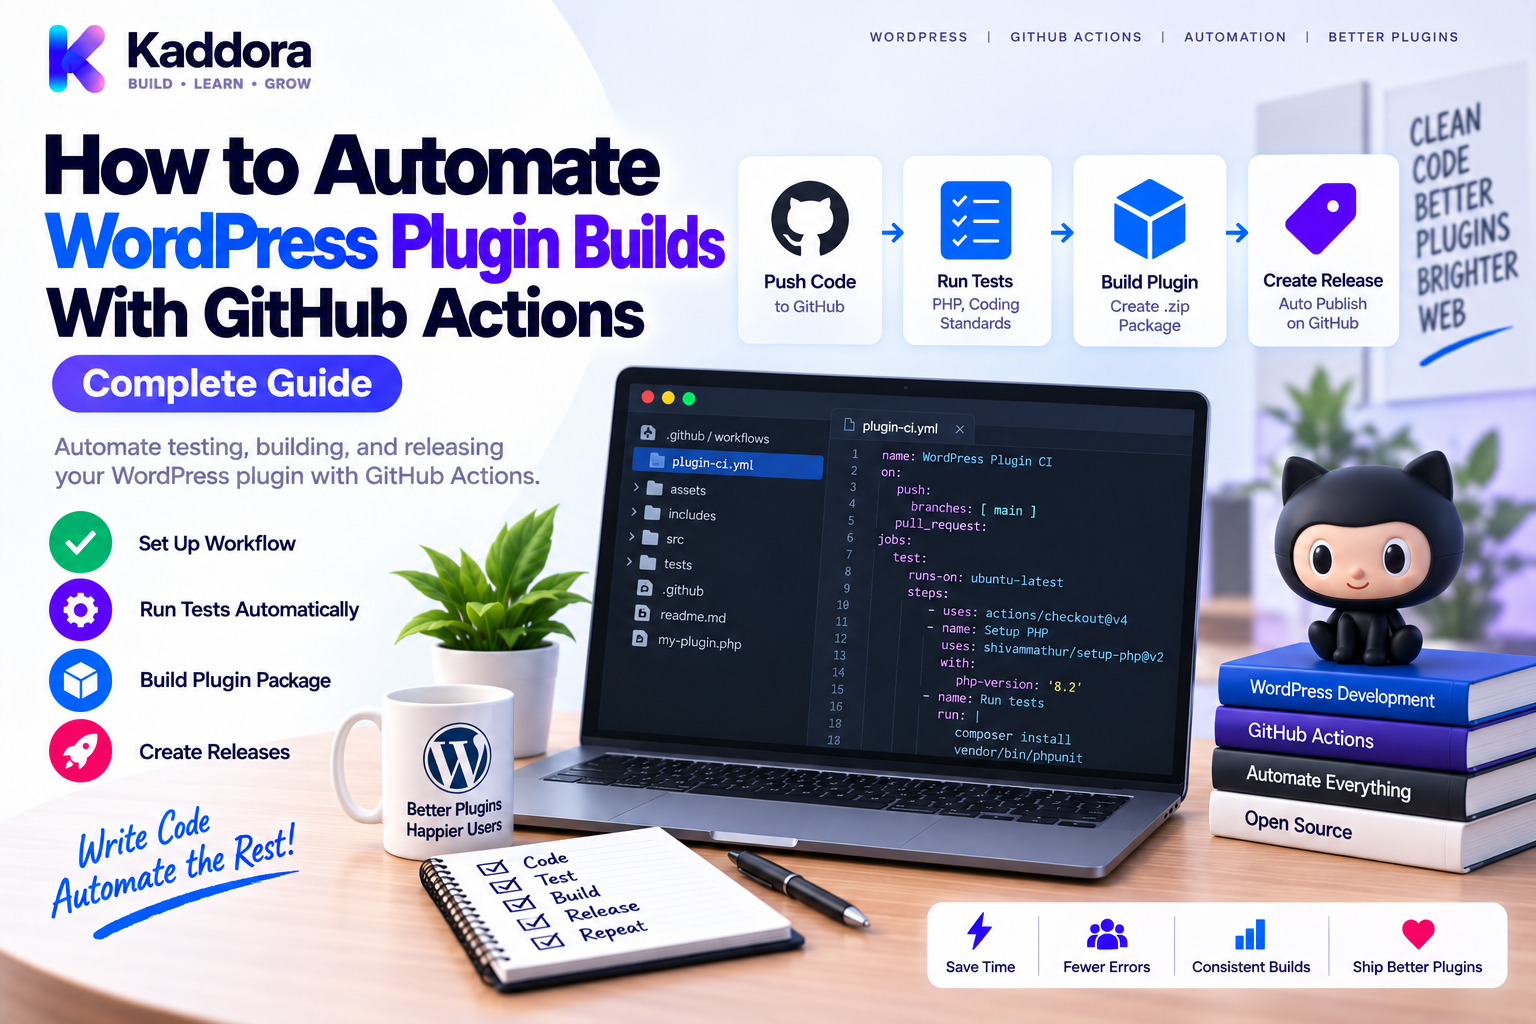
How to Automate WordPress Plugin Builds With GitHub Actions
Introduction
Developing a WordPress plugin and building a WordPress plugin are two different tasks.
During development, a repository may contain:
Source code
Tests
Composer files
Node.js dependencies
Build tools
Documentation
Git metadata
Development configuration
CI workflows
The package distributed to users should usually contain only the files required to run the plugin.
That means a release process needs a reliable way to transform:
Development Repository ↓ Quality Checks ↓ Build Process ↓ Production Package ↓ WordPress Plugin ZIP
GitHub Actions can automate this entire process.
Instead of manually copying files, installing dependencies, running build commands, creating a ZIP, and checking its contents, you can make the process repeatable.
A professional plugin build pipeline can look like:
Git Push / Release Tag ↓ GitHub Actions ↓ Composer Install ↓ Frontend Build ↓ Quality Checks ↓ Package Assembly ↓ ZIP Validation ↓ Artifact / Release
This guide explains how to create an automated WordPress plugin build system using GitHub Actions, Composer, optional Node.js tooling, package cleanup, versioning, artifact generation, and release validation.
What Is a WordPress Plugin Build?
A plugin build is the process of preparing source code for distribution.
A development repository might look like:
plugin/ ├── src/ ├── tests/ ├── assets/ ├── node_modules/ ├── vendor/ ├── .git/ ├── .github/ ├── composer.json ├── package.json └── README.md
The final package might instead contain:
plugin/ ├── src/ ├── assets/ ├── vendor/ ├── plugin.php └── readme.txt
The build process determines which files belong in the production package.
Why Automate Plugin Builds?
Manual packaging introduces avoidable errors.
A developer might accidentally:
Forget compiled assets
Include development files
Exclude a required dependency
Package the wrong version
Create inconsistent ZIP structures
Forget a required file
Ship test or CI configuration
Use uncommitted local changes
Automation provides:
Consistency
Every build follows the same process.
Repeatability
The same source produces the same intended package structure.
Faster Releases
Packaging becomes a standard CI operation.
Lower Human Error
Important build steps become executable instructions.
Better Release Confidence
The resulting ZIP can be validated automatically.
Source Repository vs Distribution Package
One of the most important concepts is separating development files from runtime files.
For example:
Development Repository ├── src/ ├── tests/ ├── docs/ ├── .github/ ├── node_modules/ ├── vendor/ ├── composer.json └── package.json
Distribution package:
Plugin ZIP ├── src/ ├── assets/ ├── vendor/ ├── plugin.php └── readme.txt
The exact package contents depend on how the plugin is distributed and whether its runtime dependencies are bundled.
Don't assume every repository file belongs in the user-facing ZIP.
Step 1: Define the Build Requirements
Before creating GitHub Actions automation, identify:
Main plugin file
Runtime PHP files
Runtime Composer dependencies
Compiled JavaScript
Compiled CSS
Images and other assets
Translation files
Required documentation
Files that must be excluded
Create a simple build map:
Source ↓ Runtime PHP + Production Dependencies + Compiled Assets ↓ Distribution ZIP
This avoids creating a build script based on guesswork.
Step 2: Create a Production Build Directory
A common approach is to build into a temporary directory:
build/ └── plugin/
For example:
Repository ↓ Build Directory ↓ plugin/
The build directory becomes the exact source used to create the ZIP.
This is safer than zipping the entire repository.
Step 3: Install Composer Dependencies
For a Composer-based plugin:
composer install \ --no-dev \ --optimize-autoloader \ --no-interaction \ --prefer-dist
The purpose is to install runtime dependencies without development packages.
Development dependencies may include:
PHPStan
PHPUnit
PHPCS
Testing utilities
Those normally do not belong in the production package.
Step 4: Build Frontend Assets
Some WordPress plugins include JavaScript or CSS built with Node.js.
A typical process is:
package.json ↓ npm ci ↓ npm run build ↓ Compiled Assets
Use npm ci in CI when a lockfile is available:
npm ci npm run build
This reproduces dependency versions from the lockfile more predictably than a fresh install.
Step 5: Separate Development and Production Dependencies
Your repository might contain:
PHP Development Dependencies ├── PHPStan ├── PHPCS └── PHPUnit
and runtime dependencies:
PHP Runtime Dependencies ├── Library A └── Library B
The release package should normally contain the runtime dependencies required for the plugin to function.
The build should intentionally separate the two.
Step 6: Create a Build Script
Instead of putting complex shell logic entirely into GitHub Actions, create a reusable script.
For example:
scripts/ └── build.sh
Conceptually:
#!/usr/bin/env bash set -euo pipefail rm -rf dist mkdir -p dist/plugin cp -R plugin.php src assets readme.txt dist/plugin/ composer install \ --no-dev \ --optimize-autoloader \ --no-interaction \ --prefer-dist
The exact copy list should match your plugin structure.
A reusable build script makes local and CI builds more consistent.
Step 7: Exclude Development Files
A release package should not blindly include everything.
Common exclusions may include:
.git .github tests node_modules docs .env .editorconfig phpunit.xml* phpstan.neon* phpcs.xml* package.json
The exact list depends on your project.
Be careful with broad exclusions.
For example, composer.json might be excluded from a distribution package in some projects, but that decision depends on your release and dependency-management strategy.
Step 8: Preserve Required Runtime Files
Excluding too much can break the plugin.
For example:
❌ Exclude vendor/
could be wrong if the plugin requires Composer dependencies at runtime and users do not run Composer themselves.
Likewise:
❌ Exclude assets/
could remove JavaScript, CSS, images, or translation resources needed by the plugin.
A good rule is:
Exclude development-only files, not files merely because they aren't PHP.
Step 9: Add Versioning to the Build
The build should know which plugin version it is producing.
One strategy is to derive the version from:
Git Tag
For example:
v1.4.0 ↓ Plugin Version ↓ ZIP Version
Another approach is to read the version from a project configuration file and verify that all relevant metadata matches.
Consistency matters more than which versioning strategy you choose.
Step 10: Create the GitHub Actions Build Workflow
A basic release-oriented workflow might look like:
name: Build Plugin on: push: tags: - 'v*' jobs: build: runs-on: ubuntu-latest steps: - name: Checkout uses: actions/checkout@v4 - name: Setup PHP uses: shivammathur/setup-php@v2 with: php-version: '8.2' coverage: none - name: Setup Node uses: actions/setup-node@v4 with: node-version: '20' cache: npm - name: Install Composer dependencies run: composer install --no-dev --optimize-autoloader --no-interaction --prefer-dist - name: Install Node dependencies run: npm ci - name: Build frontend assets run: npm run build - name: Build package run: ./scripts/build.sh - name: Upload package uses: actions/upload-artifact@v4 with: name: wordpress-plugin path: dist/*.zip
The PHP and Node.js versions should match the versions supported by the project and its build tooling.
Step 11: Build Only From a Clean Checkout
One advantage of GitHub Actions is that the runner starts from a fresh environment.
Conceptually:
Clean Checkout ↓ Install Dependencies ↓ Build
This reduces hidden local-machine dependencies.
A plugin that only builds correctly because a developer's computer has manually installed tools is not truly reproducible.
Step 12: Run Quality Checks Before Packaging
A build should generally happen after required quality checks.
For example:
Checkout ↓ Install Dev Dependencies ↓ PHPCS ↓ PHPStan ↓ PHPUnit ↓ Frontend Build ↓ Production Dependencies ↓ Package
This prevents obviously broken code from becoming a release artifact.
Step 13: Build Runtime Dependencies Separately
A common pattern is:
Development Environment ↓ composer install ↓ Tests / Quality
Then:
Release Environment ↓ composer install --no-dev ↓ Production Package
This avoids accidentally shipping development tools.
Step 14: Create the ZIP Package
Once the production directory is ready:
cd dist zip -r plugin.zip plugin
The desired structure might be:
plugin.zip └── plugin/ ├── plugin.php ├── src/ ├── assets/ └── vendor/
Avoid creating:
plugin.zip └── some-repository-name/ └── plugin/
unless that extra directory is intentional.
The package structure should match how the plugin is expected to be installed.
Step 15: Validate the ZIP
Never assume the ZIP is correct simply because the command succeeded.
Validate:
ZIP exists
Expected root directory exists
Main plugin file exists
Runtime dependencies exist
Required assets exist
Development files are absent
Sensitive files are absent
A simple validation script can fail the build if requirements aren't met.
Example ZIP Validation
#!/usr/bin/env bash set -euo pipefail ZIP="dist/plugin.zip" test -f "$ZIP" unzip -l "$ZIP" | grep -q "plugin/plugin.php" unzip -l "$ZIP" | grep -q "plugin/src/"
You can also explicitly fail if prohibited files appear.
For example:
if unzip -l "$ZIP" | grep -q "plugin/.env"; then echo "Sensitive .env file found." exit 1 fi
This creates a basic package safety gate.
Step 16: Test Installation From the ZIP
An even stronger workflow is:
Build ZIP ↓ Fresh WordPress Environment ↓ Install ZIP ↓ Activate Plugin ↓ Run Smoke Tests
This verifies the actual package rather than only the source repository.
For example, installation testing can detect:
Missing files
Missing Composer dependencies
Incorrect paths
Autoloading errors
Broken compiled assets
Invalid plugin headers
Step 17: Use Artifacts for QA
GitHub Actions can upload the build artifact:
- name: Upload build uses: actions/upload-artifact@v4 with: name: plugin-package path: dist/plugin.zip
Artifacts can then be used for:
Manual QA
Installation testing
Release review
Downloading test builds
Comparing release packages
Step 18: Separate Build and Release
A useful architecture is:
Tag ↓ Build ↓ Validate ↓ Artifact ↓ Release
Building and releasing are related but not identical.
This separation makes it easier to inspect a package before publishing it.
Step 19: Use Release Tags
Tags provide a clean release trigger.
For example:
v1.0.0 v1.1.0 v1.1.1
Workflow:
Developer ↓ Merge Code ↓ Create Tag ↓ GitHub Actions ↓ Build ↓ Validate ↓ Release
This makes releases traceable to a specific Git commit.
Step 20: Prevent Dirty or Untracked Build Output
Keep generated files out of the source repository when practical.
For example:
dist/
can be generated during CI rather than committed.
This keeps source code separate from release artifacts.
If generated files are intentionally committed, define that policy consistently.
Reproducible Build Principles
A reproducible build should minimize dependencies on developer machines.
Use:
Lockfiles
Explicit PHP versions
Explicit Node.js versions
Composer install
npm ci
Version-controlled build scripts
Clean CI runners
Defined environment requirements
Conceptually:
Same Commit + Same Dependency Locks + Same Build Process = Predictable Package
Absolute byte-for-byte reproducibility may require additional controls, but predictable build inputs and process are an excellent foundation.
Build Version Verification
A good workflow can verify that:
Git Tag Version = Plugin Header Version = Release Metadata
For example:
v2.3.0 ↓ Version 2.3.0
A mismatch should fail the build before release.
Version drift creates confusing releases and upgrade problems.
Build Performance
Build automation should be reliable but also efficient.
Use caching for:
Composer downloads
npm packages
For example, setup-node can cache npm dependencies when configured appropriately.
Avoid caching generated production directories unless there is a strong reason.
Caches should speed up builds, not become hidden dependencies.
Build Security
Build pipelines should protect against accidental leakage.
Do not include:
.env credentials private keys test secrets development tokens local configuration
Also check generated files for secrets.
A useful workflow is:
Build ↓ Secret Scan ↓ ZIP Validation ↓ Release
The production ZIP should be treated as a security-sensitive artifact.
WordPress Plugin Build With Composer
A Composer-based architecture may look like:
Repository ├── composer.json ├── composer.lock ├── src/ └── tests/
Development:
composer install
Release:
composer install --no-dev --optimize-autoloader
This distinction is particularly important when quality tools are listed under require-dev.
WordPress Plugin Build With Node.js
A modern plugin may contain:
package.json package-lock.json src/ build/
CI:
npm ci npm run build
The development source might use:
assets/src/
while the plugin package contains:
assets/build/
The exact structure depends on the project's frontend tooling.
Common Build Mistakes
Zipping the Entire Repository
This can expose tests, CI files, secrets, and development dependencies.
Forgetting Runtime Dependencies
The plugin may fail on a clean installation.
Building on a Developer Machine
Local environments can hide missing dependencies.
No Package Validation
A successful ZIP command doesn't prove the package is correct.
Version Mismatch
Git tags and plugin headers can disagree.
Missing Compiled Assets
The source may work locally while the distributed plugin lacks built JavaScript or CSS.
Shipping Secrets
Always inspect release contents.
No Installation Test
A source-level test does not guarantee the ZIP installs correctly.
AI-Assisted Plugin Build Automation
AI tools can help generate and maintain build workflows.
Useful tasks include:
Draft GitHub Actions YAML
Create build scripts
Identify development-only files
Generate ZIP validation logic
Create version checks
Debug CI failures
Suggest caching strategies
Build compatibility matrices
Generate installation smoke tests
A useful workflow is:
Build Requirement ↓ AI Draft ↓ Developer Review ↓ Test on Clean Runner ↓ Validate ZIP ↓ Release
AI should not automatically decide what belongs in a production package.
That decision depends on runtime requirements, licensing, dependencies, and distribution policy.
Recommended WordPress Plugin Build Pipeline
A production-oriented pipeline can look like:
Git Tag ↓ Clean Checkout ↓ Setup PHP / Node ↓ Install Dev Dependencies ↓ PHPCS ↓ PHPStan ↓ PHPUnit ↓ Integration Tests ↓ Build Frontend ↓ Install Production Dependencies ↓ Assemble Package ↓ Version Validation ↓ Secret Scan ↓ ZIP Validation ↓ Installation Smoke Test ↓ Artifact ↓ Release
This makes the package itself part of the testing process.
Build Checklist
Source
Clean checkout
Correct Git commit/tag
Version verified
PHP
Correct PHP version
Composer dependencies installed
Production dependencies separated
Frontend
Node.js version defined
npm ci used where appropriate
Assets built successfully
Quality
PHPCS
PHPStan
PHPUnit
Integration tests
Packaging
Production directory created
Required files copied
Development files excluded
ZIP generated
Validation
ZIP structure verified
Main plugin file verified
Runtime dependencies verified
Secrets excluded
Installation tested
Release
Artifact uploaded
Release version matches
Release generated from validated artifact
Why Choose ThemeKaddora?
For ThemeKaddora WordPress products, automated builds become increasingly valuable as products contain multiple modules, Composer dependencies, compiled assets, WooCommerce integrations, AI functionality, analytics, and external APIs.
A scalable build pipeline can be:
ThemeKaddora Source ↓ GitHub Actions ↓ Quality Checks ↓ Frontend Build ↓ Production Dependencies ↓ Plugin Package ↓ ZIP Validation ↓ Install Test ↓ Release Artifact
This approach helps ensure that the package distributed to users is assembled consistently rather than manually.
For products that need frequent updates, automated packaging also reduces release friction and makes it easier to reproduce the same build process across versions.
The goal is straightforward:
Build once, validate the actual package, and release the artifact produced by automation.
Conclusion
Automating WordPress plugin builds with GitHub Actions turns plugin packaging into a predictable engineering process.
The key steps are:
Start with a clean checkout.
Install the correct dependencies.
Build frontend assets when required.
Run quality checks.
Separate development dependencies from runtime dependencies.
Assemble a production directory.
Create the ZIP.
Validate the package.
Test installation.
Publish the validated artifact.
The most important principle is:
Don't just test the source code—test what users will actually install.
A plugin repository can be perfectly organized while the release ZIP is missing a required asset or accidentally contains development files.
GitHub Actions allows the entire process to become repeatable:
Source ↓ Quality ↓ Build ↓ Package ↓ Validate ↓ Install Test ↓ Release
For small plugins, a simple workflow may be sufficient.
For large WordPress products, automated builds provide an important foundation for reliable releases, consistent packaging, compatibility testing, and scalable plugin engineering.
As the plugin ecosystem grows, the strongest release process is not the one that depends on a developer remembering every step.
It is the one where the repository itself defines how a production-ready plugin is built.
Frequently Asked Questions
What is a WordPress plugin build?
A plugin build is the process of converting source code and its required dependencies/assets into a production-ready package that can be installed on a WordPress website.
Why automate WordPress plugin builds?
Automation improves consistency, reduces manual packaging errors, makes releases faster, and produces repeatable build artifacts.
Can GitHub Actions create WordPress plugin ZIP files?
Yes. GitHub Actions can install dependencies, run build commands, assemble a production directory, create a ZIP, validate it, and upload it as an artifact or release asset.
Should I ZIP the entire Git repository?
Usually no. A repository often contains tests, CI files, development dependencies, documentation, and other files that are not required at runtime.
Should vendor be included in a plugin ZIP?
If the plugin requires Composer runtime dependencies and users are not expected to run Composer, the required production dependencies generally need to be included.
Should node_modules be included?
Normally no. node_modules usually contains frontend development dependencies. Compile the required assets and ship the resulting runtime files instead.
Should I use composer install or composer update in a build?
For reproducible builds, composer install with the project's lock file is generally preferable when a lock file is part of the development/release workflow.
Why use npm ci instead of npm install in CI?
When a lockfile is available, npm ci is designed for clean, reproducible dependency installation based on that lockfile.
How should I exclude development files?
Build into a clean production directory and explicitly copy the runtime files, or use carefully controlled exclusion rules. Avoid simply zipping the entire repository.
Should tests run before building the plugin?
Yes. Required coding standards, static analysis, unit tests, and integration tests should normally pass before a release package is produced.
Why validate the ZIP after building it?
The build process can introduce packaging errors that source-level tests do not detect, such as missing files, incorrect paths, or accidentally included development files.
Should I test the plugin from the ZIP?
Yes. Installing the generated package in a clean WordPress environment can detect packaging and runtime problems.
How can I keep plugin versions consistent?
Use a defined source of truth such as release tags or project metadata, then automatically verify that the Git tag, plugin header, and release metadata agree.
Can GitHub Actions build frontend assets for WordPress plugins?
Yes. GitHub Actions can install Node.js dependencies, run frontend build commands, and include the compiled assets in the final plugin package.
How do I keep secrets out of plugin releases?
Do not store secrets in source code, exclude sensitive files from builds, use GitHub secret management for CI credentials, and scan the final package before release.
Should I upload the ZIP as a GitHub Actions artifact?
Yes. Artifacts are useful for QA, manual review, installation tests, and release workflows.
Should build and release be separate jobs?
Often yes. Separating package creation from publishing makes it easier to validate the exact artifact before release.
Can I trigger plugin builds from Git tags?
Yes. A workflow can run when tags matching a pattern such as v* are pushed.
How can I make plugin builds reproducible?
Use clean CI runners, dependency lockfiles, explicit runtime versions, deterministic build commands, version-controlled build scripts, and controlled production packaging.
Can AI help automate WordPress plugin builds?
Yes. AI can draft GitHub Actions workflows, build scripts, ZIP validation, version checks, and CI troubleshooting steps. The final build design should be reviewed against the plugin's actual runtime and distribution requirements.
Why choose Themekaddora?
Themekaddora provides lightweight, responsive, SEO-friendly WordPress themes with fast performance, WooCommerce compatibility, flexible customization, accessibility-conscious design, modern templates, regular updates, and professional support—providing a strong foundation for businesses building digital products and product-focused websites.
Comments (0)