
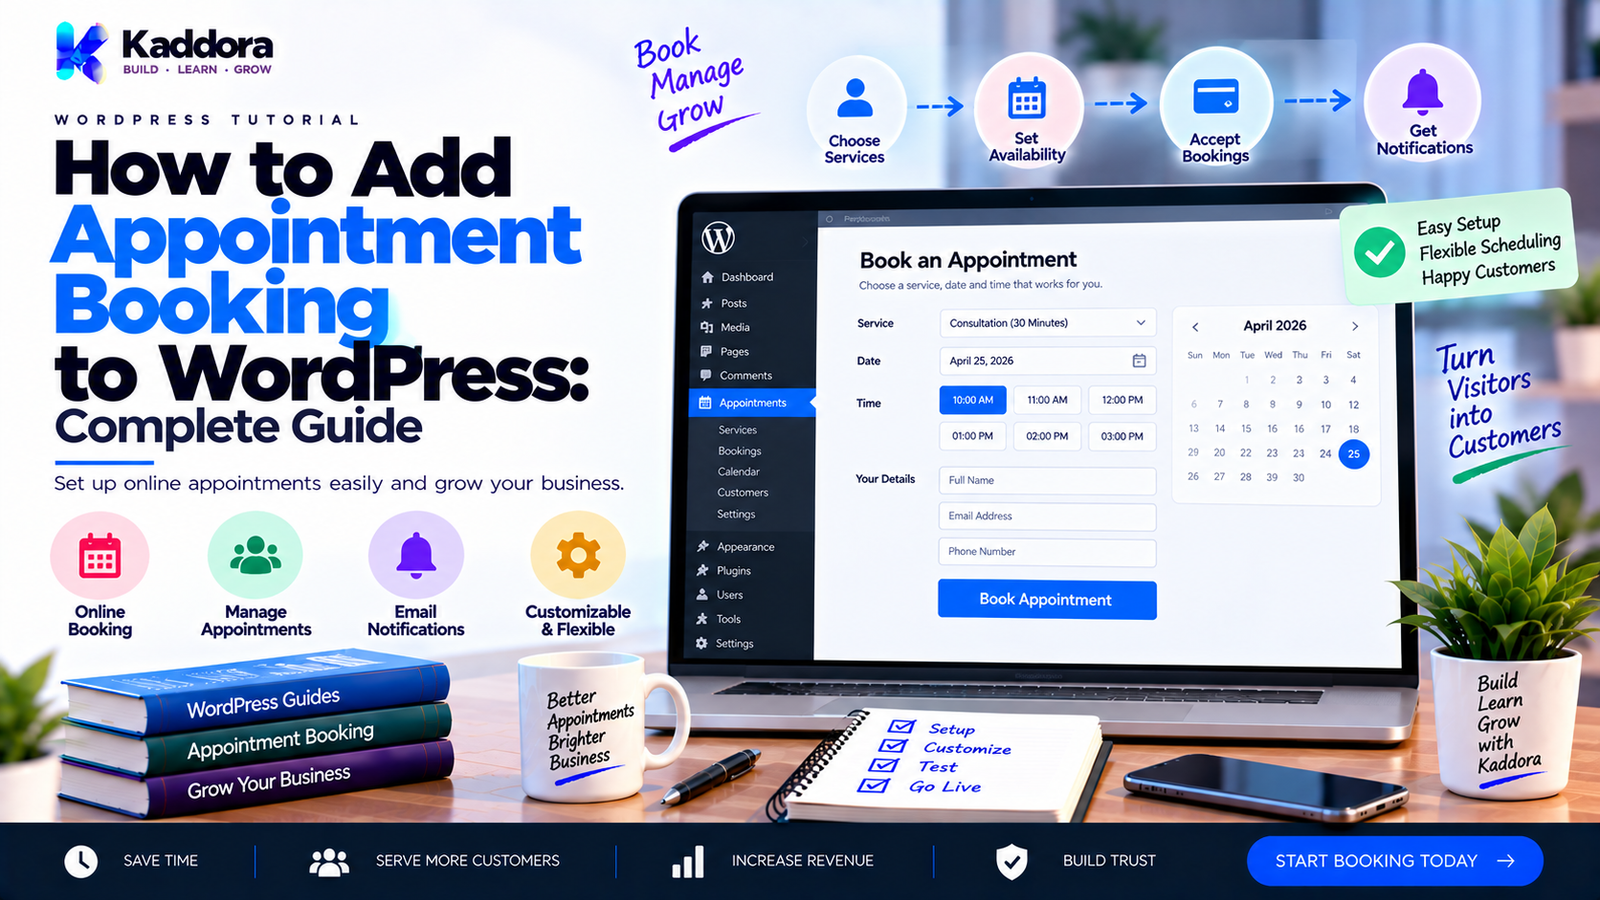
How to Add Appointment Booking to WordPress: Complete Guide
Introduction
Many businesses need more than a simple contact form.
Doctors need patients to book consultations.
Salons need customers to schedule appointments.
Consultants need clients to reserve time slots.
Agencies may need discovery calls.
Tutors need lesson bookings.
Fitness businesses need class reservations.
Home-service businesses need customers to select services and available time slots.
A traditional contact form can collect a request, but it does not necessarily provide real-time availability, appointment scheduling, reminders, cancellations, or calendar management.
This is where WordPress appointment booking becomes useful.
A properly designed booking system can allow visitors to:
Select a service
Choose a staff member
Select a date
View available time slots
Enter customer information
Confirm an appointment
Pay online when required
Receive confirmation
Reschedule or cancel when permitted
A typical workflow looks like this:
Visitor ↓ Select Service ↓ Select Staff / Location ↓ Choose Date ↓ Check Availability ↓ Select Time Slot ↓ Enter Details ↓ Payment (Optional) ↓ Booking Confirmed ↓ Email / SMS Notification ↓ Calendar / Admin Dashboard
WordPress can provide this functionality through a dedicated appointment booking plugin or a custom booking system.
In this guide, you'll learn how to add appointment booking to WordPress, what features a booking system needs, how availability works, how to create booking forms, how to manage staff and services, how to add payments and notifications, how to integrate calendars and WooCommerce, and how to build a scalable appointment booking workflow.
What Is Appointment Booking in WordPress?
Appointment booking in WordPress allows website visitors to reserve a service, time slot, resource, or meeting directly from a website.
Instead of:
Customer ↓ Contact Form ↓ Business Calls Customer ↓ Find Available Time ↓ Confirm Appointment
an online booking system can provide:
Customer ↓ Booking Calendar ↓ Available Time Slots ↓ Customer Selects Slot ↓ Booking Confirmed
This reduces manual scheduling work and gives customers a more convenient booking experience.
Why Add Appointment Booking to WordPress?
Appointment booking can benefit businesses in several ways.
24/7 Booking
Customers can request appointments outside business hours.
Less Manual Scheduling
Visitors can choose available times without repeated phone calls or messages.
Better Organization
Appointments can be managed from a central dashboard.
Fewer Scheduling Errors
Availability rules can help prevent conflicting reservations.
Automated Notifications
Customers and staff can receive confirmation and reminder messages.
Online Payments
Businesses can optionally collect payments during booking.
Better Customer Experience
Visitors can complete the scheduling process directly on the website.
Which Businesses Need WordPress Appointment Booking?
Appointment booking can work for many industries.
Examples include:
Doctors and clinics
Dentists
Salons
Spas
Consultants
Coaches
Tutors
Lawyers
Therapists
Fitness trainers
Photography businesses
Cleaning services
Repair services
Agencies
Real estate consultations
Home-service businesses
The booking workflow should be customized around the business model.
What Do You Need to Add Appointment Booking to WordPress?
A complete appointment booking system usually contains:
+--------------------------------+ | WordPress Website | +---------------+----------------+ | ↓ +--------------------------------+ | Services | +---------------+----------------+ | ↓ +--------------------------------+ | Staff / Providers | +---------------+----------------+ | ↓ +--------------------------------+ | Availability & Calendar | +---------------+----------------+ | ↓ +--------------------------------+ | Booking Form | +---------------+----------------+ | ↓ +--------------------------------+ | Payment (Optional) | +---------------+----------------+ | ↓ +--------------------------------+ | Confirmation & Notifications | +---------------+----------------+ | ↓ +--------------------------------+ | Admin Dashboard | +--------------------------------+
A simple appointment system may use only services, availability, booking forms, and notifications.
A larger system may also include payments, staff scheduling, resources, locations, recurring appointments, analytics, and calendar synchronization.
Step 1: Choose a WordPress Appointment Booking Plugin
The easiest way to add appointment booking is usually to use a dedicated WordPress booking plugin.
Before choosing one, compare:
Booking calendar
Available time slots
Services
Staff management
Working hours
Buffer time
Holidays
Recurring schedules
Customer management
Notifications
Payments
Cancellations
Rescheduling
Calendar integration
WooCommerce support
Reporting
Choose functionality based on your actual workflow rather than simply selecting the plugin with the longest feature list.
Step 2: Define Your Booking Model
Before creating a booking form, decide what exactly customers are booking.
For example:
Business ↓ Service ↓ Provider ↓ Location ↓ Date ↓ Time
A consultation business might use:
Service: 30-Minute Consultation Staff: John Location: Online Duration: 30 Minutes
A salon might use:
Service: Hair Styling Staff: Stylist A Location: Branch 1 Duration: 60 Minutes
The booking model should reflect the real-world service.
Step 3: Create Services
Services define what the customer can book.
A service may include:
Service name
Description
Duration
Price
Staff
Location
Availability
Buffer time
Booking rules
For example:
Services │ ├── Consultation │ ├── 30 Minutes │ └── $40 │ ├── Premium Consultation │ ├── 60 Minutes │ └── $80 │ └── Follow-Up ├── 20 Minutes └── $25
This structure makes the booking process easier to manage.
Step 4: Add Staff Members
Some businesses need different employees or service providers.
For example:
Staff │ ├── Dr. Smith ├── Dr. Adams ├── Dr. Taylor └── Dr. Brown
Each staff member can have:
Working hours
Breaks
Services
Locations
Holidays
Booking capacity
For example:
Dr. Smith Monday 09:00–17:00 Tuesday 09:00–17:00 Wednesday 11:00–19:00 Thursday Off Friday 09:00–15:00
This allows availability to be calculated based on the selected provider.
Step 5: Configure Business Hours
Your appointment system needs to know when bookings are possible.
For example:
Monday 09:00–18:00 Tuesday 09:00–18:00 Wednesday 09:00–18:00 Thursday 09:00–18:00 Friday 09:00–18:00 Saturday 10:00–14:00 Sunday Closed
The system can then generate available time slots from these rules.
Step 6: Add Breaks and Buffer Time
Business hours alone are not enough.
A staff member may need:
Lunch break
Preparation time
Cleanup time
Travel time
Equipment setup
For example:
Appointment 09:00–10:00 ↓ Buffer 10:00–10:15 ↓ Next Available Slot 10:15
Buffer time helps prevent appointments from being scheduled too closely together.
Step 7: Configure Holidays and Unavailable Dates
Businesses need a way to block dates.
Examples include:
Public holidays
Staff leave
Vacations
Business closure
Maintenance days
Special events
The availability logic can look like:
Requested Date ↓ Business Open? / \ Yes No ↓ ↓ Check Time No Slots
This prevents customers from booking unavailable dates.
Step 8: Build the Booking Calendar
The booking calendar is one of the most important parts of the customer experience.
A simple interface might look like:
SEPTEMBER Su Mo Tu We Th Fr Sa 1 2 3 4 5 6 7 8 9 10 11 12 13 14 15 16 17 18 19 20 21 22 23 24 25 26 27 28 29 30 Selected Date: September 22 Available Times: 09:00 09:30 10:30 11:00 14:00 15:30
The calendar should display only valid booking dates and times whenever possible.
Step 9: Calculate Available Time Slots
Availability calculation is the core of an appointment system.
The system needs to consider:
Business hours
Staff schedule
Service duration
Buffer time
Existing appointments
Holidays
Minimum notice
Maximum booking window
Location availability
Resource availability
A simplified calculation looks like:
Business Hours ↓ Staff Availability ↓ Blocked Dates ↓ Existing Bookings ↓ Service Duration ↓ Buffer Time ↓ Booking Rules ↓ Available Slots
This is why appointment scheduling is more complex than displaying a calendar.
Step 10: Prevent Double Booking
A reliable booking system must protect against two customers selecting the same slot simultaneously.
For example:
Customer A ↓ Selects 10:00 Customer B ↓ Selects 10:00
The system needs to verify availability again before confirming the booking.
A safer flow is:
Select Slot ↓ Temporary Reservation / Validation ↓ Check Availability Again ↓ Create Booking ↓ Mark Slot Unavailable
Server-side validation should always be the final authority.
Never rely only on JavaScript availability checks.
Step 11: Create the Booking Form
A booking form may collect:
Name
Phone
Service
Staff
Date
Time
Notes
Additional information
For example:
Name: [____________] Email: [____________] Phone: [____________] Service: [ Consultation ▼ ] Staff: [ Dr. Smith ▼ ] Date: [ Sep 22 ▼ ] Time: [ 10:30 ▼ ] Notes: [________________________] [ Confirm Appointment ]
Only collect information that the business actually needs.
Step 12: Add Booking Rules
A good booking system should provide configurable rules.
Examples include:
Minimum notice
Maximum booking window
Appointment duration
Buffer time
Cancellation deadline
Rescheduling deadline
Maximum bookings per slot
Customer booking limits
For example:
Minimum Notice: 2 Hours Maximum Advance Booking: 60 Days Cancellation Window: 24 Hours Buffer Time: 15 Minutes
These rules should be validated on the server.
Step 13: Add Appointment Confirmation
After the booking succeeds, show a confirmation page.
For example:
+--------------------------------+ | Appointment Confirmed | +--------------------------------+ | Service: Consultation | | Staff: Dr. Smith | | Date: September 22 | | Time: 10:30 AM | | Booking ID: KDR-10428 | +--------------------------------+ | [ Add to Calendar ] | | [ Reschedule ] [ Cancel ] | +--------------------------------+
A booking ID makes support and administration easier.
Step 14: Send Confirmation Emails
Customers should receive a confirmation message.
The email can include:
Appointment details
Customer name
Service
Date
Time
Location
Booking ID
Cancellation link
Rescheduling link
A typical workflow is:
Booking Created ↓ Email Notification ↓ Customer
Staff can also receive a notification.
Step 15: Add Appointment Reminders
Reminders can reduce missed appointments.
For example:
Booking Created ↓ Confirmation Email ↓ 24 Hours Before ↓ Reminder ↓ 1 Hour Before ↓ Reminder
Depending on the system, reminders can be delivered by:
SMS
Push notification
The available channels depend on the integrations you choose.
Step 16: Add Cancellation and Rescheduling
Customers may need to change their appointments.
Provide secure links for:
Cancel
Reschedule
View booking
For example:
Customer Email ↓ Manage Appointment ↓ Cancel / Reschedule ↓ Validate Request ↓ Update Booking
Use secure, time-limited or otherwise protected links where appropriate.
Don't expose appointment management through predictable, unauthenticated URLs.
Step 17: Add Online Payments
Some businesses need payment during booking.
Possible payment flows include:
Select Appointment ↓ Customer Details ↓ Payment ↓ Payment Confirmed ↓ Booking Confirmed
A booking system can support:
Full payment
Deposit
No payment
Payment later
Don't mark a paid booking as successfully completed merely because a browser returned from a payment page.
Payment status should be verified through the payment provider's trusted server-side response or webhook flow.
Step 18: Connect WooCommerce
WooCommerce can be useful when appointments need ecommerce functionality.
For example:
Service ↓ WooCommerce Product ↓ Checkout ↓ Payment ↓ Booking
Possible use cases include:
Paid consultations
Service deposits
Packages
Appointment bundles
Coupons
Taxes
Invoices
The exact architecture depends on whether the booking is the primary product or a separate scheduling record linked to an order.
Step 19: Connect Google Calendar or Other Calendars
Calendar integration can reduce scheduling conflicts.
A typical concept is:
WordPress Booking ↓ Calendar Integration ↓ External Calendar
Depending on the integration, the system may:
Add appointments to a calendar
Read busy periods
Synchronize updates
Synchronize cancellations
When using external calendar APIs, handle authentication credentials securely and clearly define what data is transmitted.
Step 20: Add Multiple Locations
Businesses with multiple locations need location-aware scheduling.
For example:
Business │ ├── Delhi │ ├── Staff A │ └── Staff B │ ├── Mumbai │ ├── Staff C │ └── Staff D │ └── Online └── Staff E
Availability can depend on:
Location
Staff
Service
Resource
Working hours
This makes location a separate scheduling dimension.
Step 21: Add Resources
Some appointments require a resource in addition to a staff member.
Examples include:
Meeting room
Equipment
Vehicle
Treatment room
Photography studio
A booking may require:
Service + Staff + Room = Valid Appointment
The availability engine should prevent two bookings from consuming the same resource simultaneously.
Step 22: Add Recurring Appointments
Some businesses use repeating schedules.
Examples:
Weekly coaching
Monthly consultation
Recurring therapy
Fitness sessions
Tutoring
A recurring appointment can be represented as:
Every Monday ↓ 10:00 AM ↓ 4 Weeks
Recurring bookings require additional handling for:
Existing conflicts
Holidays
Staff availability
Cancellation
Rescheduling
Payment
Don't assume that recurring appointments are simply duplicate single appointments.
Step 23: Create an Admin Dashboard
The admin side should provide a clear overview.
For example:
+------------------------------------------------+ | Appointments | +------------------------------------------------+ | Today: 18 Upcoming: 72 Pending: 6 | +------------------------------------------------+ | Time Customer Service Status | | 09:00 John Doe Consultation Confirmed | | 10:00 Jane Smith Follow-up Pending | | 11:30 Alex Brown Premium Confirmed | +------------------------------------------------+
Useful admin features include:
Calendar view
List view
Filters
Search
Customer details
Appointment status
Staff assignment
Notes
Payment status
Step 24: Add Appointment Statuses
A booking system should have clear statuses.
For example:
Pending Confirmed Completed Cancelled No-Show Rescheduled
This makes reporting and workflow management easier.
The system should define exactly what each status means.
Step 25: Add Customer Management
Customer records can help businesses manage repeat appointments.
A customer profile might contain:
Name
Phone
Appointment history
Preferences
Notes
Tags
For example:
Customer ↓ Appointment History ├── 12 Aug ├── 28 Aug ├── 14 Sep └── 22 Sep
Collect and retain only information that is appropriate and necessary for your service.
Step 26: Add Search and Filters
As appointment volume grows, finding records becomes more difficult.
Provide filters such as:
Date
Staff
Service
Location
Status
Customer
Payment state
This improves administration efficiency.
Step 27: Add Calendar Views
Useful views include:
Day View
09:00 ─ Appointment 10:00 ─ Appointment 11:00 ─ Available 12:00 ─ Break 13:00 ─ Appointment
Week View
Mon Tue Wed Thu Fri 09:00 A - B C - 10:00 A D B - E 11:00 - D - C E
Month View
Useful for understanding overall booking volume.
Step 28: Add Time-Zone Support
Time zones become important for:
Remote consultations
International customers
SaaS platforms
Global teams
A booking system should define which timezone controls:
Business hours
Staff schedules
Appointment display
Notifications
Avoid silently assuming that the visitor's browser timezone is always the business timezone.
Step 29: Add Availability by Staff
Different employees may have different schedules.
For example:
Staff A Mon–Fri 09:00–17:00 Staff B Mon–Wed 11:00–19:00 Staff C Sat–Sun 10:00–16:00
The availability engine combines:
Service + Staff + Schedule + Existing Appointments + Rules = Available Slots
Step 30: Add Front-End Shortcodes or Blocks
The booking interface needs to be displayed on your website.
Depending on your plugin architecture, this can be done through:
Shortcodes
Gutenberg blocks
Page builder widgets
Template tags
For example:
Appointment Booking Page [appointment_booking]
A modern block-based implementation can also provide configuration directly in the WordPress editor.
Step 31: Use AJAX or REST API for Dynamic Booking
Appointment calendars often need to update dynamically.
For example:
Select Service ↓ Request Availability ↓ Server Calculates Slots ↓ Return Available Times ↓ Display Calendar
REST API or AJAX can be used depending on the architecture.
The server must remain the source of truth.
Never trust time-slot availability calculated exclusively in JavaScript.
Step 32: Protect Booking Endpoints
Booking systems handle customer information and potentially payments.
Protect endpoints with:
Nonces where appropriate
Capability checks for administrative actions
Input validation
Sanitization
Prepared SQL queries
Permission callbacks
Rate limiting where appropriate
Secure authentication
Public booking forms may not require administrator capabilities, but they still need validation and abuse protection.
Step 33: Validate Availability on the Server
A customer could modify JavaScript requests manually.
Therefore, the backend must validate:
Selected Service Selected Staff Selected Date Selected Time Current Availability Booking Rules
before creating the booking.
For example:
if ( ! $availability_service->is_available( $staff_id, $service_id, $start_time ) ) { return new WP_Error( 'kaddora_slot_unavailable', __( 'The selected time is no longer available.', 'kaddora-example' ) ); }
The exact implementation depends on the plugin architecture.
Step 34: Prevent Race Conditions
Two requests can arrive almost simultaneously.
For example:
Request A → 10:00 available Request B → 10:00 available
Both could attempt to create a booking.
The system needs transactional or database-level protection appropriate to its storage design.
At minimum:
Validate Availability ↓ Attempt Reservation ↓ Verify Success ↓ Create Booking
For complex booking systems, database constraints and carefully designed locking or reservation mechanisms may be necessary.
Step 35: Add Booking Limits
Businesses may limit:
Appointments per day
Appointments per customer
Appointments per staff member
Bookings per time slot
For example:
Maximum Appointments Per Slot: 3
This can be useful for:
Group consultations
Classes
Workshops
Events
Step 36: Add Group Bookings
Not every appointment is one-to-one.
A group booking can look like:
Yoga Class Capacity: 15 Booked: 10 / 15 Remaining: 5
The system should track capacity rather than simply marking the slot as occupied after one booking.
Step 37: Add Waitlists
If a popular time slot is full:
Time Slot Full ↓ Join Waitlist ↓ Slot Becomes Available ↓ Notify Waitlisted Customer
Waitlists can be useful for classes and high-demand services.
The notification workflow should avoid automatically promising availability before the slot is actually secured.
Step 38: Add Booking Analytics
Useful metrics include:
Total appointments
Completed appointments
Cancellations
No-shows
Revenue
Bookings by service
Bookings by staff
Bookings by location
Example:
Appointment Report Total Bookings 840 Completed 702 Cancelled 96 No-Shows 42 Revenue $28,400
Analytics help businesses identify operational patterns.
Step 39: Add Export Functionality
Admins may need to export appointment data.
Possible formats include:
CSV
Excel-compatible files
PDF reports
Exports may contain personal information, so restrict access appropriately.
Step 40: Create a Complete Booking Workflow
A mature appointment system can use:
Visitor ↓ Select Service ↓ Select Staff ↓ Select Location ↓ Choose Date ↓ Choose Time ↓ Enter Customer Details ↓ Validate Availability ↓ Payment ↓ Create Booking ↓ Send Confirmation ↓ Schedule Reminder ↓ Sync Calendar ↓ Appointment Completed
Each stage should have a clear responsibility.
WordPress Appointment Booking Plugin Architecture
A modular plugin might use:
appointment-booking/ │ ├── appointment-booking.php │ ├── src/ │ ├── Core/ │ │ └── Plugin.php │ │ │ ├── Booking/ │ │ ├── BookingService.php │ │ ├── AvailabilityService.php │ │ └── BookingValidator.php │ │ │ ├── Services/ │ │ └── ServiceManager.php │ │ │ ├── Staff/ │ │ └── StaffManager.php │ │ │ ├── Customers/ │ │ └── CustomerManager.php │ │ │ ├── Calendar/ │ │ └── CalendarService.php │ │ │ ├── Notifications/ │ │ └── NotificationService.php │ │ │ ├── Payments/ │ │ └── PaymentService.php │ │ │ ├── Integrations/ │ │ ├── WooCommerce/ │ │ └── GoogleCalendar/ │ │ │ ├── Admin/ │ │ └── AdminPages.php │ │ │ └── Api/ │ └── RestController.php │ ├── templates/ ├── assets/ └── languages/
The exact architecture depends on the complexity of the plugin.
The important principle is separating booking, availability, notifications, payments, integrations, and administration.
Example Appointment Booking Data Model
A booking record might conceptually contain:
Booking ├── ID ├── Customer ID ├── Service ID ├── Staff ID ├── Location ID ├── Start Time ├── End Time ├── Status ├── Payment Status ├── Notes └── Created At
Supporting records might include:
Services Staff Customers Locations Resources Schedules Bookings Payments Notifications
Choose the storage architecture according to your actual requirements and expected scale.
WordPress Appointment Booking Database Design
For a simple plugin, WordPress post types and metadata may be sufficient.
For a more complex booking system with:
Large booking volumes
Advanced availability
Reporting
Complex relationships
High-frequency queries
custom database tables may be more appropriate.
For custom tables:
Use $wpdb
Use prepared statements for dynamic values
Use indexes based on actual query patterns
Track schema versions
Use controlled migrations
Avoid direct SQL from templates
Database architecture should follow expected workload rather than assumptions.
Appointment Booking With WooCommerce
A WooCommerce booking system can connect scheduling with ecommerce.
For example:
Service Selected ↓ Booking Created ↓ WooCommerce Order ↓ Payment ↓ Payment Verified ↓ Booking Confirmed
This enables features such as:
Coupons
Taxes
Order history
Customer accounts
Refund workflows
Product packages
Booking and order status should remain logically distinct even when linked.
Appointment Booking With Email Marketing
Appointments can also trigger email workflows.
For example:
Appointment Created ↓ Confirmation Email ↓ Reminder ↓ Appointment Completed ↓ Follow-Up Email
A marketing system could later segment customers based on appointment activity.
Keep transactional appointment messages separate from marketing campaigns where appropriate.
Appointment Booking With CRM
A booking event can update a CRM:
Booking Created ↓ CRM Integration ↓ Customer / Lead Updated
Possible data includes:
Customer name
Service
Appointment date
Booking status
Only transmit the data required by the integration, and secure API credentials appropriately.
Appointment Booking With AI
AI can support appointment systems in several ways.
Examples include:
Natural-language booking assistants
Automated FAQs
Service recommendations
Appointment summaries
Follow-up message generation
A possible flow is:
Customer ↓ AI Assistant ↓ Understands Request ↓ Checks Booking Options ↓ Presents Valid Slots ↓ Customer Confirms ↓ Booking Created
AI should not bypass the authoritative booking rules.
Availability still needs to be verified by the booking system itself.
Appointment Booking Security Checklist
A booking system should protect:
Customer Data
Validate submitted information
Sanitize stored values where appropriate
Escape output
Restrict administrative access
Booking Requests
Validate service
Validate staff
Validate date
Validate time
Re-check availability server-side
Prevent duplicate reservations
Admin Requests
Capability checks
Nonce verification
Input validation
Secure status changes
REST / AJAX
Permission checks
Nonce protection where appropriate
Rate limiting where appropriate
Secure responses
Payments
Verify payment server-side
Validate webhook requests
Never trust browser-only payment status
WordPress Appointment Booking Checklist
Booking
Services
Staff
Locations
Resources
Calendar
Time slots
Availability rules
Booking form
Booking confirmation
Scheduling
Business hours
Staff schedules
Breaks
Buffer time
Holidays
Minimum notice
Maximum booking window
Time-zone handling
Customer Management
Customer profiles
Appointment history
Notes
Search
Filters
Notifications
Confirmation email
Staff notification
Reminder
Cancellation notice
Rescheduling notice
Payments
Payment option
Deposit option
Payment verification
Refund workflow
Integrations
WooCommerce
Calendar
CRM
SMS where required
Administration
Calendar view
Appointment list
Statuses
Search
Filters
Reports
Export
Security
Capability checks
Nonces
Validation
Sanitization
Escaping
Prepared queries
Permission callbacks
How to Add Appointment Booking to an Existing WordPress Website
A practical implementation process is:
Step 1
Identify what customers need to book.
Step 2
Choose a booking plugin or custom solution.
Step 3
Create services.
Step 4
Add staff members.
Step 5
Configure business hours.
Step 6
Add holidays, breaks, and buffer periods.
Step 7
Create the booking form.
Step 8
Configure appointment rules.
Step 9
Connect email notifications.
Step 10
Add payments when required.
Step 11
Connect calendars or WooCommerce if needed.
Step 12
Test availability and double-booking protection.
Step 13
Test customer confirmation and cancellation.
Step 14
Launch the booking page.
Step 15
Monitor appointments and improve the workflow.
Common WordPress Appointment Booking Mistakes
Using a Contact Form Instead of a Booking System
A contact form does not automatically manage real-time availability.
Not Rechecking Availability
Frontend availability is not enough. The server must verify the slot before confirming.
Ignoring Buffer Time
Back-to-back appointments may not be realistic for some businesses.
No Cancellation Workflow
Customers need a controlled way to manage appointments.
Sending Unverified Payment Confirmations
Always verify payments using trusted server-side mechanisms.
No Time-Zone Strategy
This can create confusion for remote or international customers.
Overcomplicated Booking Forms
Only collect necessary information.
No Calendar Integration Where Needed
Staff may continue using external calendars and accidentally create conflicts.
No Double-Booking Protection
Concurrent requests can create conflicting appointments if the backend is not designed carefully.
Storing Everything in Post Meta
This can become difficult for large, highly relational booking datasets.
Overengineering a Small Booking System
A simple business does not always need a massive scheduling architecture.
How to Improve the Appointment Booking Experience
A better booking experience should be:
Simple
Customers should understand what to do next.
Fast
Don't make visitors complete unnecessary steps.
Transparent
Clearly show:
Service
Duration
Price
Staff
Date
Time
Location
Responsive
The booking calendar should work well on mobile devices.
Reliable
Availability should be accurate.
Flexible
Support cancellation and rescheduling where appropriate.
Accessible
Use readable controls, sufficient contrast, keyboard-accessible interactions, and clear labels.
How to Test a WordPress Appointment Booking System
Before launching, test real-world scenarios.
Basic Booking
Can a customer successfully create an appointment?
Invalid Slot
What happens when the selected slot becomes unavailable?
Double Booking
What happens when two requests attempt the same slot?
Cancellation
Can a customer cancel according to the configured rules?
Rescheduling
Can the customer choose another valid slot?
Payment Failure
Does the booking remain appropriately pending or fail safely?
Email Failure
Does the booking remain stored even if notification delivery fails?
Staff Schedule
Are unavailable staff correctly removed from available slots?
Holiday
Are closed dates blocked?
Mobile
Does the booking process work on smaller screens?
Time Zone
Are appointment times displayed consistently?
When Should You Build a Custom Appointment Booking Plugin?
A custom plugin may make sense when you need:
Complex availability rules
Multiple staff
Multiple locations
Custom resources
Unique business workflows
Advanced WooCommerce integration
Custom CRM integration
Custom payment logic
Specialized reporting
Full control over data architecture
A ready-made plugin may be more practical when standard booking features are sufficient.
The decision should be based on requirements, development cost, maintenance, and long-term needs.
Why Choose ThemeKaddora?
At ThemeKaddora, we develop WordPress plugins, WooCommerce solutions, themes, HTML templates, UI kits, SaaS products, AI tools, analytics systems, marketing solutions, automation tools, and business-focused digital products.
For businesses that need appointment scheduling, a WordPress-centered solution can provide functionality such as:
Booking calendars
Services
Staff scheduling
Locations
Resources
Payments
Notifications
WooCommerce integration
Calendar synchronization
Automation
Customer management
ThemeKaddora focuses on practical WordPress development with responsive interfaces, maintainable architecture, performance-conscious implementation, and integration-ready solutions.
When adding appointment booking to WordPress, evaluate the complete workflow rather than only the booking form.
Availability, scheduling rules, customer management, payments, reminders, cancellations, security, and long-term maintenance are equally important.
Final Thoughts
Adding appointment booking to WordPress can transform a basic website into a complete scheduling platform.
The core workflow is:
Services
Staff
Availability
Booking Calendar
Customer Details
Payment
Notifications
Appointment Management
=
WordPress Appointment Booking System
Start by defining exactly what customers need to book.
Then configure services, staff schedules, working hours, breaks, holidays, buffers, and booking rules.
Build a simple booking form.
Make the server the final authority on availability.
Protect the booking process with validation, permissions, secure requests, and appropriate anti-abuse measures.
Add confirmation emails and reminders.
Provide cancellation and rescheduling where appropriate.
Connect WooCommerce when appointments require ecommerce functionality.
Connect external calendars when staff need synchronization.
For more advanced businesses, add resources, locations, recurring appointments, waitlists, group bookings, analytics, and CRM integrations.
Don't forget the operational side.
A booking system is not just a calendar.
It is a combination of:
Customer Experience + Scheduling Logic + Data Management + Payments + Notifications + Administration + Security
The best appointment booking system is one that makes scheduling easy for customers while keeping availability accurate and business operations organized.
Whether you use an existing WordPress booking plugin or build a custom appointment system, the goal should remain the same:
Make booking simple, scheduling reliable, and appointment management efficient.
Frequently Asked Questions
How do I add appointment booking to WordPress?
You can add appointment booking by installing a suitable WordPress booking plugin or developing a custom booking system with services, availability, calendars, booking forms, notifications, and optional payments.
What is WordPress appointment booking?
WordPress appointment booking allows visitors to select services, dates, time slots, and other options and reserve appointments directly through a WordPress website.
Do I need a plugin for appointment booking?
A plugin is usually the simplest approach. A custom solution may be appropriate when you have specialized scheduling requirements.
What features should a WordPress appointment booking plugin have?
Useful features include services, staff, schedules, availability, calendars, booking forms, confirmations, reminders, cancellations, rescheduling, payments, and administration.
Can I add a booking calendar to WordPress?
Yes. A booking plugin or custom solution can provide a front-end calendar that displays available appointment dates and time slots.
Can customers choose a staff member?
Yes. Booking systems can allow customers to select a specific staff member when the service supports individual providers.
Can AI be used in appointment booking?
Yes. AI can assist with booking conversations, FAQs, service recommendations, and appointment summaries, but final availability should be determined by the booking system.
Can customers manage bookings from their account?
Yes. A customer dashboard can display upcoming appointments, history, cancellation options, and rescheduling functionality.
Can appointment booking integrate with user accounts?
Yes. Customers can be linked to WordPress user accounts or managed as separate customer records, depending on the design.
Why choose ThemeKaddora?
ThemeKaddora develops WordPress plugins, themes, WooCommerce solutions, AI tools, automation systems, analytics products, templates, UI kits, and business-focused digital products that can support modern appointment and scheduling workflows.
Comments (0)