
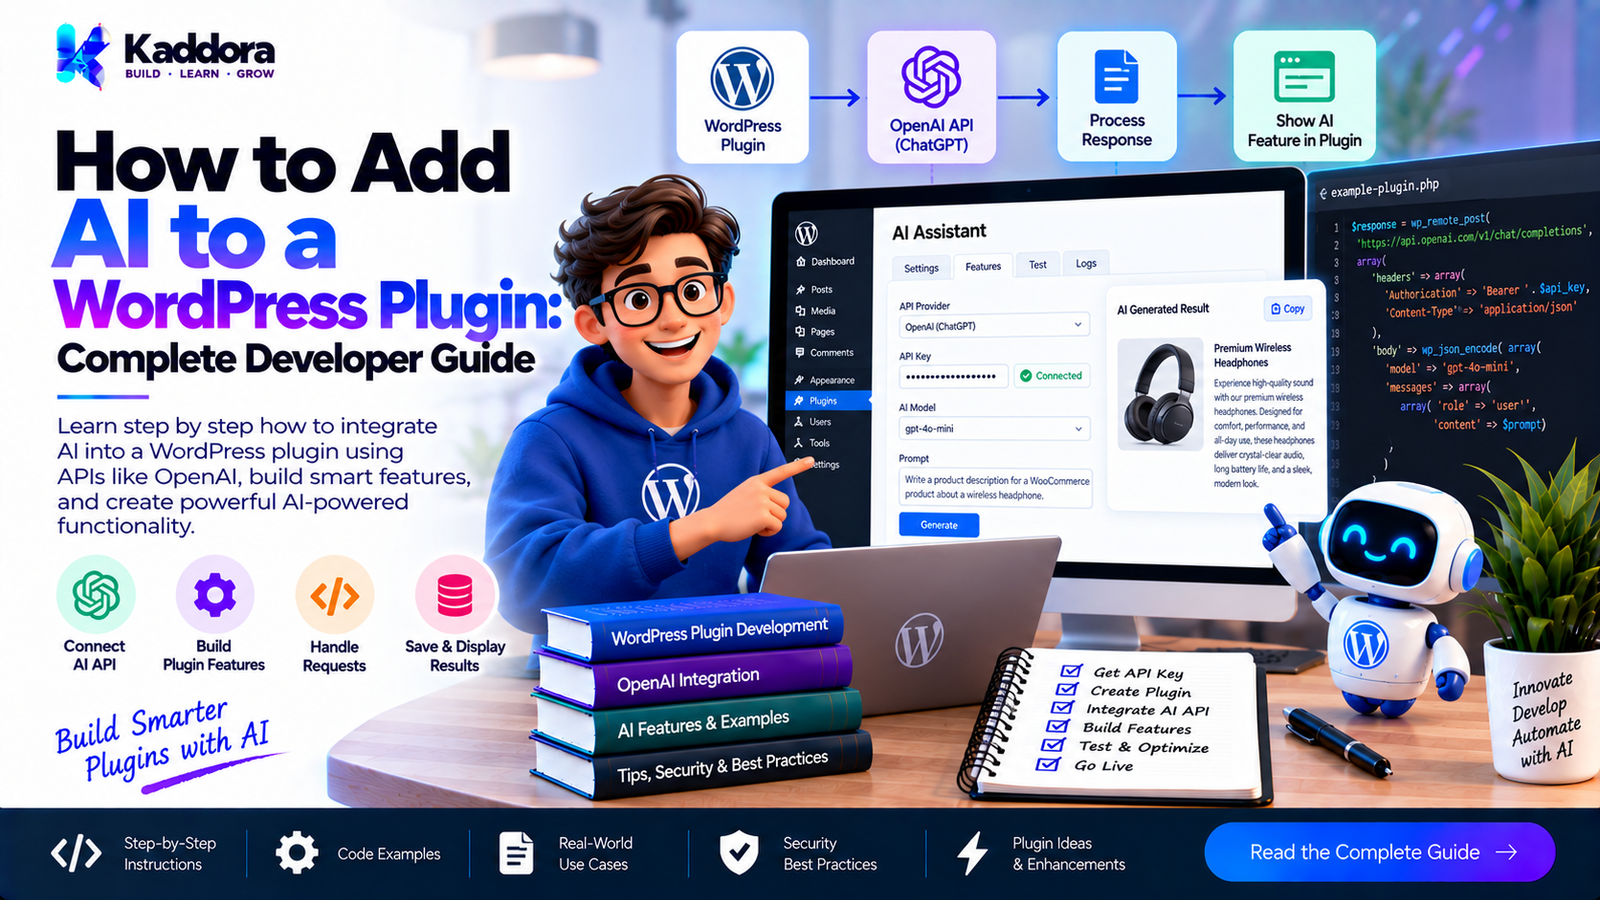
How to Add AI to a WordPress Plugin: Complete Developer Guide
Introduction
Artificial intelligence can add powerful functionality to WordPress plugins. Instead of relying only on predefined rules, developers can use AI to generate content, analyze information, answer questions, process images, create recommendations, automate workflows, and assist website administrators.
Adding AI to a WordPress plugin, however, involves much more than sending a request to an AI API.
A production-ready AI integration should consider:
API authentication
Request validation
Response validation
Security
Privacy
Performance
API costs
Rate limiting
Error handling
Caching
Background processing
User experience
For example, a traditional WordPress plugin might follow a fixed workflow:
WordPress Input ↓ Plugin Rules ↓ Fixed Result
An AI-powered plugin can introduce intelligent processing:
WordPress Input ↓ AI Service ↓ AI Analysis ↓ Generated Result ↓ WordPress Plugin
This guide explains how to add AI to a WordPress plugin and how to build the integration using a practical, secure, and maintainable architecture.
What Does It Mean to Add AI to a WordPress Plugin?
Adding AI to a WordPress plugin generally means connecting the plugin to an AI model or external AI service and using the resulting information within the plugin's functionality.
For example, a content plugin could send a topic to an AI service:
Topic ↓ WordPress Plugin ↓ AI API ↓ Generated Content ↓ WordPress Editor
An AI integration can support many use cases, including:
Content generation
Content rewriting
Content summarization
SEO recommendations
AI chatbots
Customer support
Image analysis
Alt text generation
Product descriptions
Product recommendations
Semantic search
Data classification
Data extraction
Workflow automation
Developer assistance
The best AI integrations begin with a specific problem rather than simply adding AI as a feature.
How AI Integration Works in a WordPress Plugin
A typical AI-powered WordPress plugin can be organized like this:
WordPress Admin / Visitor ↓ Plugin Interface ↓ Request Handler ↓ AI Service ↓ API Client ↓ AI Provider ↓ API Response ↓ Response Validation ↓ Plugin Action
Each component can have a specific responsibility.
For example:
Plugin Interface handles user interaction.
Request Handler validates incoming requests.
AI Service handles AI-related business logic.
API Client communicates with the external provider.
Response Validation checks returned data.
Plugin Action uses the validated result.
This separation becomes increasingly useful as the plugin grows.
Step 1: Define the AI Use Case
Before writing code, determine exactly what the AI feature should accomplish.
For example:
Content Plugin
Generate a blog introduction.
SEO Plugin
Suggest a meta description.
WooCommerce Plugin
Generate a product description.
Image Plugin
Generate image alt text.
Support Plugin
Answer customer questions.
Search Plugin
Understand natural-language searches.
A clearly defined use case makes it easier to design the API request, user interface, validation rules, and storage strategy.
Step 2: Choose an AI Provider
Your plugin needs access to an AI model or service.
Depending on the project, you may integrate an external AI provider through an API.
Before selecting a provider, consider:
Supported models
API documentation
Pricing
Request limits
Response formats
Privacy policies
Availability
Authentication
Supported content types
The provider should match the requirements of your plugin rather than being selected only because it is popular.
Step 3: Decide Where the API Request Happens
Private AI API requests should normally be handled server-side.
A safer architecture looks like:
Browser ↓ WordPress ↓ Plugin ↓ AI API
Avoid exposing private API credentials through browser-side JavaScript.
The browser should communicate with WordPress, while the WordPress plugin communicates with the external AI provider.
Step 4: Store API Credentials Securely
Many AI services require API credentials.
A plugin can provide an administrator settings page where the website owner enters the credential.
For example:
AI Settings Provider: [AI Provider] API Key: [**********************] Model: [Selected Model] [Save Settings]
Production API credentials should never be hard-coded into plugin source code.
Avoid code such as:
$api_key = 'REAL_SECRET_API_KEY';
Instead, use an appropriate WordPress configuration or settings mechanism and protect access to those settings.
Step 5: Create a WordPress Settings Page
A dedicated AI settings page can allow administrators to configure the integration.
Possible settings include:
AI provider
API key
Model
Maximum output
Temperature
AI feature status
Logging options
Request limits
The settings page should be protected with appropriate WordPress capabilities.
Only authorized administrators should be able to modify sensitive AI configuration.
Step 6: Validate Plugin Settings
When administrators save AI settings, the plugin should validate the submitted values.
A typical workflow is:
Submitted Setting ↓ Validation ↓ Sanitization ↓ Save
Different values require different validation approaches.
For example:
API keys
Model names
URLs
Numeric settings
Boolean options
Email addresses
should not all be processed in exactly the same way.
Step 7: Create an AI Service Layer
Avoid placing all AI communication directly inside an admin page callback.
A dedicated service can keep the integration organized.
For example:
class MyPlugin_AI_Service { public function generate( $prompt ) { // Process AI request. } }
The exact implementation will depend on the plugin.
A simplified architecture could be:
Admin Interface ↓ AI Service ↓ API Client ↓ AI Provider
This separation makes future maintenance easier.
Step 8: Use the WordPress HTTP API
WordPress provides HTTP API functions for communicating with external services.
Depending on the provider and request, a plugin can use functions such as:
wp_remote_post()
or:
wp_remote_get()
A typical workflow is:
Prepare Request ↓ Send HTTP Request ↓ Check Response ↓ Decode Response ↓ Validate Data
Using WordPress's HTTP API keeps the implementation aligned with the WordPress ecosystem.
Step 9: Build the AI API Request
An AI API request can contain:
Authentication
Endpoint
HTTP method
Headers
Request body
Model
Instructions
User input
Conceptually:
POST AI Endpoint Authorization: API Credential Content-Type: application/json { "model": "selected-model", "input": "Generate a product description" }
The exact request format depends on the AI provider and its current API documentation.
Developers should always implement against the provider's current documentation rather than assuming all AI APIs use the same format.
Step 10: Validate User Input
User input should not automatically be passed into an AI workflow without validation.
For example:
Product Title ↓ Validate ↓ Sanitize ↓ AI Request
The correct processing method depends on the data.
Different handling may be required for:
Plain text
HTML
URLs
IDs
Email addresses
Structured data
Input validation is important both for security and predictable AI behavior.
Step 11: Design the Prompt Carefully
AI output depends partly on the instructions provided to the model.
A weak instruction might be:
Write something about this product.
A more structured instruction might be:
Write a concise WooCommerce product description. Requirements: - Use clear language. - Explain the main product benefits. - Avoid unsupported claims. - Do not invent specifications. - Return plain text.
A good prompt should provide:
Context
Objective
Constraints
Output requirements
Clear instructions can make the resulting workflow more predictable.
Step 12: Separate Instructions From User Data
AI requests can contain multiple types of information:
Trusted Plugin Instructions + Website Content + User Input + Retrieved Information
These sources should not automatically be treated as equally trusted instructions.
User-generated or externally retrieved content should generally be treated as untrusted data.
This is particularly important for:
AI chatbots
AI search
Knowledge bases
Document analysis
Customer support
Content summarization
Step 13: Send the API Request
Once the request is prepared, the plugin can communicate with the AI service.
A typical flow is:
User Action ↓ Validate Input ↓ Build Prompt ↓ Build API Request ↓ Send Request
The plugin should always assume that external services can fail.
Step 14: Handle API Errors
AI API requests can fail for many reasons.
Common problems include:
Invalid API key
Rate limit
Network failure
Timeout
Invalid request
Unsupported model
Provider outage
Empty response
The plugin should handle these cases gracefully.
Instead of exposing raw technical errors, provide understandable messages to administrators or visitors.
For example:
Unable to generate the response right now. Please check your AI configuration and try again.
Detailed technical information can be logged appropriately for debugging.
Step 15: Validate the AI Response
Never assume that a successful API request means the returned information is suitable for immediate use.
Suppose your plugin expects:
{ "title": "Example", "description": "Example description" }
The plugin should verify:
The response is valid.
Required fields exist.
Data types are correct.
Values are not unexpectedly empty.
Content meets expected limits.
AI output should be treated as external, untrusted data.
Step 16: Sanitize and Escape AI Output
AI-generated output must be handled according to how it will be used.
If content is displayed in HTML, escape it appropriately.
If HTML is intentionally supported, use suitable WordPress sanitization methods instead of allowing arbitrary markup.
If data is stored, ensure it is stored according to the expected format.
AI output should never bypass WordPress security controls simply because it came from an AI service.
Step 17: Add Human Review
For many AI features, human review is an important part of the workflow.
A useful pattern is:
AI Generates ↓ Human Reviews ↓ Human Edits ↓ Publish
For example, an AI content plugin can place generated content into the WordPress editor instead of automatically publishing it.
This allows users to check:
Accuracy
Tone
Brand requirements
Formatting
Unsupported claims
Missing information
Step 18: Add Caching
Repeated AI requests can increase API usage and costs.
Without caching:
Request ↓ AI API ↓ Response
With caching:
Request ↓ Cache Check ↓ Cached Result → Return
If no suitable cached result exists:
Request ↓ Cache Check ↓ AI API ↓ Response ↓ Save Cache
Caching can reduce:
API requests
API costs
Response times
Server workload
Caching should be designed carefully when the underlying information changes frequently.
Step 19: Use Background Processing
Some AI operations can take significant time.
For example, processing thousands of products in one browser request can lead to timeouts.
A better approach is:
Products ↓ Queue ↓ Background Processing ↓ AI API ↓ Save Results
Background processing can improve:
Reliability
Performance
Scalability
User experience
This is particularly useful for bulk content generation, image processing, product processing, and large-scale analysis.
Step 20: Add Rate Limiting
AI functionality can be abused if every user is allowed unlimited requests.
For example:
User ↓ AI Request ↓ AI Request ↓ AI Request ↓ AI Request
A rate-limiting system can restrict usage based on requirements.
Possible limits include:
Requests per minute
Requests per user
Requests per IP
Requests per operation
Administrator-only generation
The appropriate method depends on the plugin's use case.
Step 21: Monitor AI Usage
AI integrations can benefit from usage monitoring.
Useful metrics may include:
Total AI requests
Failed requests
Response time
Token usage where applicable
Estimated costs
Rate-limit events
Feature usage
Monitoring helps administrators identify unexpected usage and potential problems.
Step 22: Control AI API Costs
AI requests can create recurring costs.
Avoid unnecessary requests.
Instead of:
Every Page Load ↓ AI API Request
consider:
Content Changed ↓ AI Processing ↓ Save Result ↓ Reuse Result
This approach can significantly reduce unnecessary API consumption.
Step 23: Consider Privacy
Before sending WordPress data to an external AI service, determine exactly what information is transmitted.
For example:
Customer Message ↓ WordPress Plugin ↓ External AI Provider
The customer message may contain personal or confidential information.
The plugin should minimize unnecessary data transmission and clearly communicate relevant data handling.
Website owners should also review applicable privacy requirements and the AI provider's data-handling policies.
Step 24: Consider Prompt Injection
AI plugins that process user-generated or externally retrieved content should consider prompt injection risks.
For example, a user could submit content containing instructions designed to manipulate how the AI processes the request.
A safer approach separates:
Trusted Plugin Instructions
from:
Untrusted User Content
The final output should also be validated before being used for important operations.
Step 25: Do Not Let AI Directly Control Critical Actions Without Validation
AI output should not automatically control sensitive operations without appropriate safeguards.
Avoid allowing unvalidated AI responses to directly:
Change product prices
Delete users
Modify permissions
Process financial transactions
Send mass emails
Execute arbitrary code
A safer workflow is:
AI Output ↓ Validation ↓ Business Rules ↓ Permission Check ↓ Action
AI should assist the plugin's business logic rather than bypass it.
Step 26: Add Appropriate Logging
Logging can help developers diagnose AI integration problems.
Useful information may include:
Request status
Response status
Error type
Processing duration
Feature being used
Provider response metadata
Do not unnecessarily log:
API keys
Passwords
Authentication tokens
Private customer information
Logging should support troubleshooting without creating a new privacy or security problem.
Step 27: Test the AI Integration
AI functionality should be tested under both normal and failure conditions.
Test Successful Requests
Verify that:
The API request is sent correctly.
The response is received.
The response is parsed.
The generated result is displayed or saved.
Test Invalid Credentials
Use an invalid credential and verify that the plugin provides an understandable error.
Test Rate Limits
Verify that the plugin handles rate-limit responses gracefully.
Test Empty Responses
Make sure the plugin does not assume that every successful response contains usable content.
Test Timeouts
Verify that a slow external service does not break the entire WordPress request.
Test Invalid Input
Submit unexpected or malformed input and verify that validation prevents inappropriate requests.
Example AI WordPress Plugin Architecture
A simple plugin might use the following structure:
my-ai-plugin/ │ ├── my-ai-plugin.php │ ├── includes/ │ ├── class-settings.php │ ├── class-ai-service.php │ ├── class-api-client.php │ ├── class-response-handler.php │ └── class-admin.php │ ├── admin/ │ ├── views/ │ └── assets/ │ ├── assets/ │ ├── css/ │ └── js/ │ ├── languages/ │ └── uninstall.php
The structure should match the plugin's actual complexity.
A small plugin does not necessarily need a large number of architectural layers.
Example AI Request Flow
A complete request can follow this pattern:
Administrator Clicks "Generate" ↓ Nonce Verification ↓ Capability Check ↓ Input Validation ↓ AI Service ↓ API Client ↓ AI Provider ↓ Response Validation ↓ Sanitization ↓ Display Result ↓ Human Review ↓ Save Content
This is safer and more maintainable than directly sending browser input to an external AI service.
Adding AI to WooCommerce Plugins
AI can be integrated into WooCommerce plugins for many use cases.
For example, an AI product description feature can work like this:
WooCommerce Product ↓ Get Product Data ↓ Validate Product Data ↓ Build AI Prompt ↓ Send API Request ↓ Receive Response ↓ Validate Output ↓ Display Draft ↓ Merchant Review ↓ Save Description
The merchant remains in control of the final product information.
Other WooCommerce AI use cases include:
Product recommendations
Product categorization
Search
Upselling
Cross-selling
Image alt text
Customer support
Marketing content
Adding AI to the WordPress Editor
AI can also be integrated directly into content editing workflows.
For example:
WordPress Editor ↓ AI Assistant ↓ Generate / Rewrite / Summarize ↓ Editor Review ↓ Update Content
Possible features include:
Generate introduction
Rewrite paragraph
Summarize content
Generate headings
Suggest meta descriptions
Improve readability
Generate content ideas
Adding an AI Chatbot to a WordPress Plugin
An AI chatbot can use a workflow such as:
Visitor ↓ Chat Interface ↓ WordPress Endpoint ↓ Authentication / Validation ↓ Knowledge Retrieval ↓ AI Service ↓ AI Provider ↓ Response Validation ↓ Visitor
If the chatbot uses website documentation or other knowledge sources, relevant information can be retrieved before the AI generates its response.
AI and the WordPress REST API
A plugin can expose its own REST API endpoint for AI functionality.
For example:
POST /wp-json/my-plugin/v1/generate
The endpoint can:
Authenticate the request.
Check permissions.
Validate input.
Process the AI request.
Validate the response.
Return structured data.
REST endpoints should be secured according to the plugin's requirements.
AI Plugin Performance Best Practices
To improve performance:
Avoid AI requests on every page load.
Cache reusable results.
Use asynchronous operations where appropriate.
Use background processing for bulk operations.
Limit request sizes.
Avoid unnecessary repeated prompts.
Store reusable generated results.
Monitor response times.
AI should enhance a WordPress website rather than become a source of unnecessary performance problems.
AI Plugin Security Best Practices
A secure AI-powered plugin should:
Protect API credentials.
Verify nonces where applicable.
Check user capabilities.
Validate incoming data.
Sanitize data appropriately.
Escape output.
Validate AI responses.
Protect REST API endpoints.
Consider rate limiting.
Keep private credentials server-side.
Treat AI output as untrusted data.
Prevent AI from bypassing normal business rules.
AI Plugin Privacy Best Practices
When developing an AI-powered plugin:
Identify external AI processing.
Minimize information sent to external services.
Avoid transmitting unnecessary personal information.
Provide appropriate settings and controls.
Review the provider's data policies.
Document external data transmission.
Consider applicable privacy requirements.
Data minimization is particularly important for customer support, contact forms, memberships, accounts, and other user-facing functionality.
Common Mistakes When Adding AI to WordPress Plugins
Mistake 1: Hard-Coding API Keys
Real API credentials should never be placed directly in plugin source code.
Mistake 2: Sending Every Request to AI
Use AI where it provides meaningful value rather than for every operation.
Mistake 3: Trusting AI Output
AI output can be incorrect or unexpected. Validate it before using it.
Mistake 4: Running Large AI Tasks During Page Requests
Bulk operations should generally use asynchronous or background processing.
Mistake 5: Ignoring API Costs
Repeated AI requests can create unexpected expenses.
Mistake 6: Ignoring Privacy
Understand what information is being transmitted to external providers.
Mistake 7: Exposing Credentials in JavaScript
Private API keys should remain server-side.
Mistake 8: Allowing AI to Perform Critical Actions Automatically
Sensitive actions should pass through validation, permissions, and business rules.
When Should You Add AI to a WordPress Plugin?
AI is useful when it solves a specific problem.
Good use cases include:
Generating repetitive content
Classifying large amounts of information
Understanding natural-language questions
Creating recommendations
Summarizing content
Assisting customer support
Processing images
Improving internal search
Automating repetitive workflows
AI may not be necessary when a simple deterministic WordPress function can solve the problem more efficiently.
The goal should be to use AI where it provides measurable value.
AI Plugin Development Checklist
Before releasing an AI-powered WordPress plugin, review the following checklist.
Architecture
AI functionality is separated from the user interface.
API communication is centralized.
Business logic is separated where appropriate.
Security
API credentials are protected.
Nonces are used where applicable.
Capabilities are checked.
Inputs are validated.
Outputs are escaped or sanitized appropriately.
API
API errors are handled.
Timeouts are handled.
Rate limits are considered.
API responses are validated.
Performance
Results are cached where appropriate.
Expensive operations use background processing.
Unnecessary requests are avoided.
Privacy
External data transmission is documented.
Unnecessary personal information is not sent.
AI provider data handling has been reviewed.
User Experience
Loading states are provided.
Errors are understandable.
Generated content can be reviewed.
Users understand when AI is being used.
Why Choose Kaddora?
Kaddora focuses on WordPress plugins, themes, templates, and business-oriented website solutions.
Adding AI to WordPress requires more than connecting an API. A practical AI-powered plugin should combine secure API integration with WordPress development practices, performance optimization, data validation, privacy considerations, and a useful user experience.
ThemeKaddora provides WordPress-focused products and resources covering areas such as:
AI
SEO
WooCommerce
Automation
Analytics
Website management
WordPress plugins
WordPress themes
Website templates
For businesses and developers exploring AI-powered WordPress functionality, a structured plugin approach can make AI features easier to integrate, maintain, and expand.
Conclusion
Adding AI to a WordPress plugin can introduce powerful capabilities such as content generation, customer support, semantic search, product recommendations, image analysis, automation, and intelligent workflows.
However, successful AI integration is more than simply making an API request.
A reliable implementation should include:
Secure API credential handling
Clear plugin architecture
Input validation
Response validation
Error handling
Rate limiting
Caching
Background processing
Privacy considerations
Performance optimization
Human review where appropriate
The most effective AI WordPress plugins are not necessarily those with the largest number of AI features. They are the plugins that use AI to solve a clear problem while maintaining security, performance, reliability, privacy, and user control.
By combining WordPress development practices with carefully designed AI integrations, developers can build plugins that are more useful, maintainable, and prepared for future AI capabilities.
Frequently Asked Questions
Can I add AI to an existing WordPress plugin?
Yes. An existing plugin can be extended with AI functionality by adding an AI service, API client, settings, request handling, response validation, and the required user interface.
Do I need an AI API to add AI to WordPress?
If your plugin communicates with an external AI provider, you will generally need access to that provider's API or another supported integration method.
Where should an AI API request happen?
Private AI API requests should normally happen server-side so that secret API credentials are not exposed to website visitors.
Can I use the WordPress HTTP API for AI integration?
Yes. WordPress provides HTTP API functions that plugins can use to communicate with external services.
Should I store AI-generated content in WordPress?
It depends on the feature. Storing reusable generated results can reduce repeated API requests and improve performance.
How can I reduce AI API costs?
You can reduce costs by caching results, avoiding unnecessary requests, processing only changed content, limiting request sizes, and using background processing for bulk operations.
Is AI-generated content safe to publish automatically?
AI-generated content can contain inaccurate or inappropriate information. Human review is recommended for important content, especially when accuracy, brand requirements, product information, or factual claims matter.
How do I secure an AI API key in a WordPress plugin?
Keep private credentials server-side and avoid exposing them through front-end JavaScript or publicly accessible source code. Use appropriate WordPress settings or configuration mechanisms.
Can AI be used in WooCommerce plugins?
Yes. AI can be used for product descriptions, recommendations, search, customer support, categorization, alt text, upselling, and other WooCommerce workflows.
Can I build an AI chatbot as a WordPress plugin?
Yes. A chatbot plugin can combine a front-end chat interface, WordPress endpoints, an AI service, and optionally a knowledge-retrieval system.
What is the most important thing when adding AI to WordPress?
Start with a clearly defined problem. The AI integration should provide meaningful value while maintaining security, privacy, performance, reliability, and control over generated output.
Can AI functionality slow down a WordPress website?
Yes. External AI requests can add network latency and processing time. Caching, asynchronous requests, and background processing can help reduce the impact.
Should every WordPress plugin use AI?
No. AI should be used when it provides a meaningful advantage. Simple deterministic functionality can often be faster, cheaper, and more predictable than an AI-based implementation.
Why choose Themekaddora?
Themekaddora provides lightweight, responsive, SEO-friendly WordPress themes with fast performance, WooCommerce compatibility, flexible customization, accessibility-conscious design, modern templates, regular updates, and professional support—providing a strong foundation for businesses building digital products and product-focused websites.
Comments (0)